MATERIAL
YARN = “Baby Soft” by “Laines du Nord”: 9 balls of 50 gr, color 502
NEEDLES = 3.5 and 4 mm
OTHER = tapestry needle, scissor, pins.
SHARE
ABBREVIATIONS
RS = right side
WS = wrong side
st(s) = stitch(es)
R = row
K = knit
P = purl
SKP = slip 1, K1, pass slipped stitch over
K2tog = knit 2 sts together
rep ** = repeat from * to *
NOTES
Difficulty level: Intermediate
Slip without working it the 1a st of each RS row.
MEASURES
SIZE M (this pattern is designed to be worn with a positive ease)
POINTS USED
2/2 rib st, stoking st
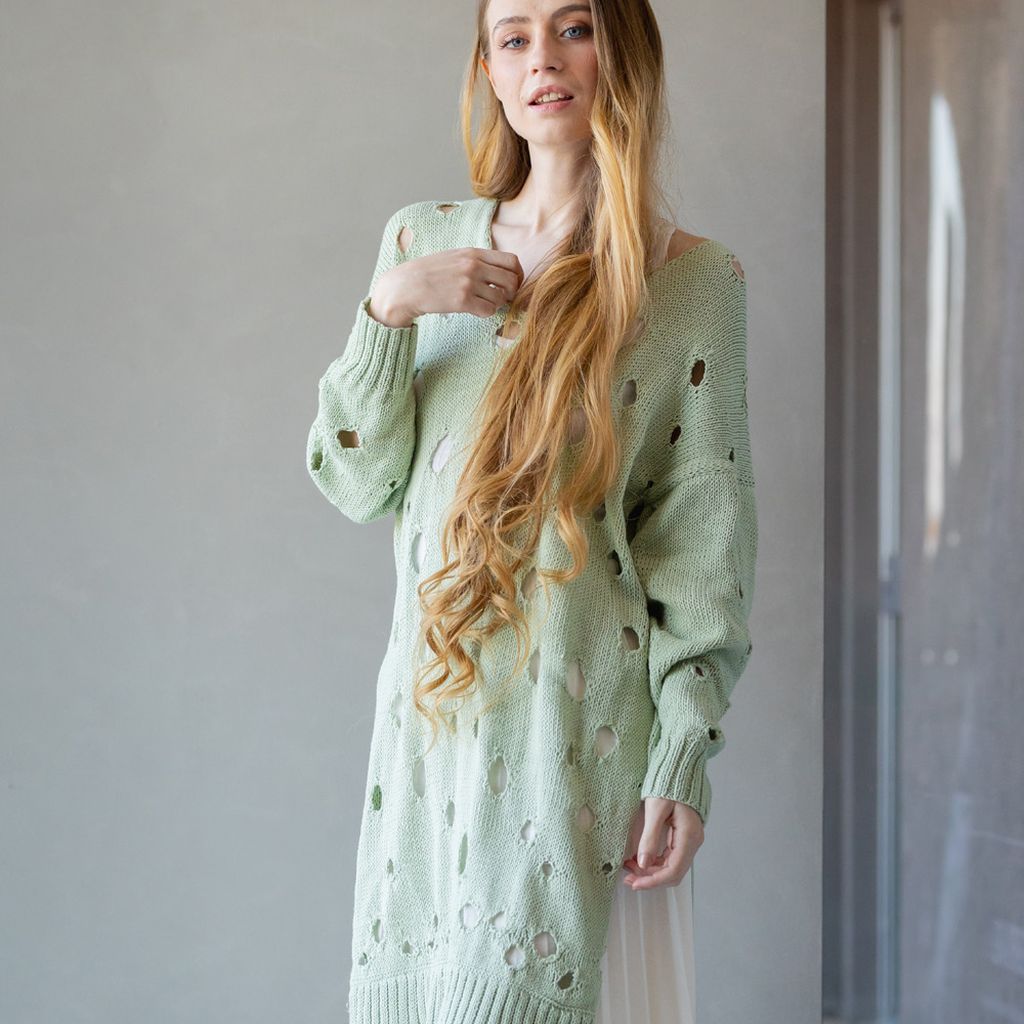
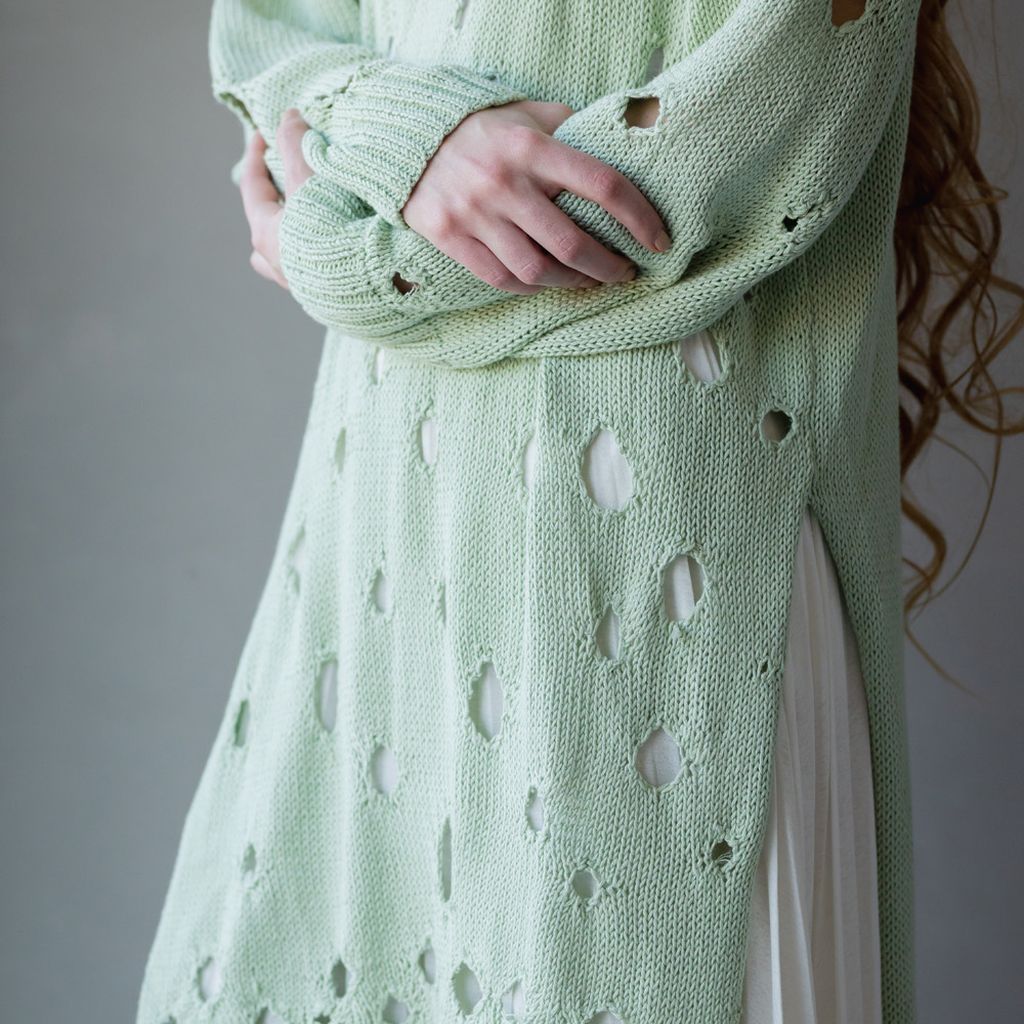
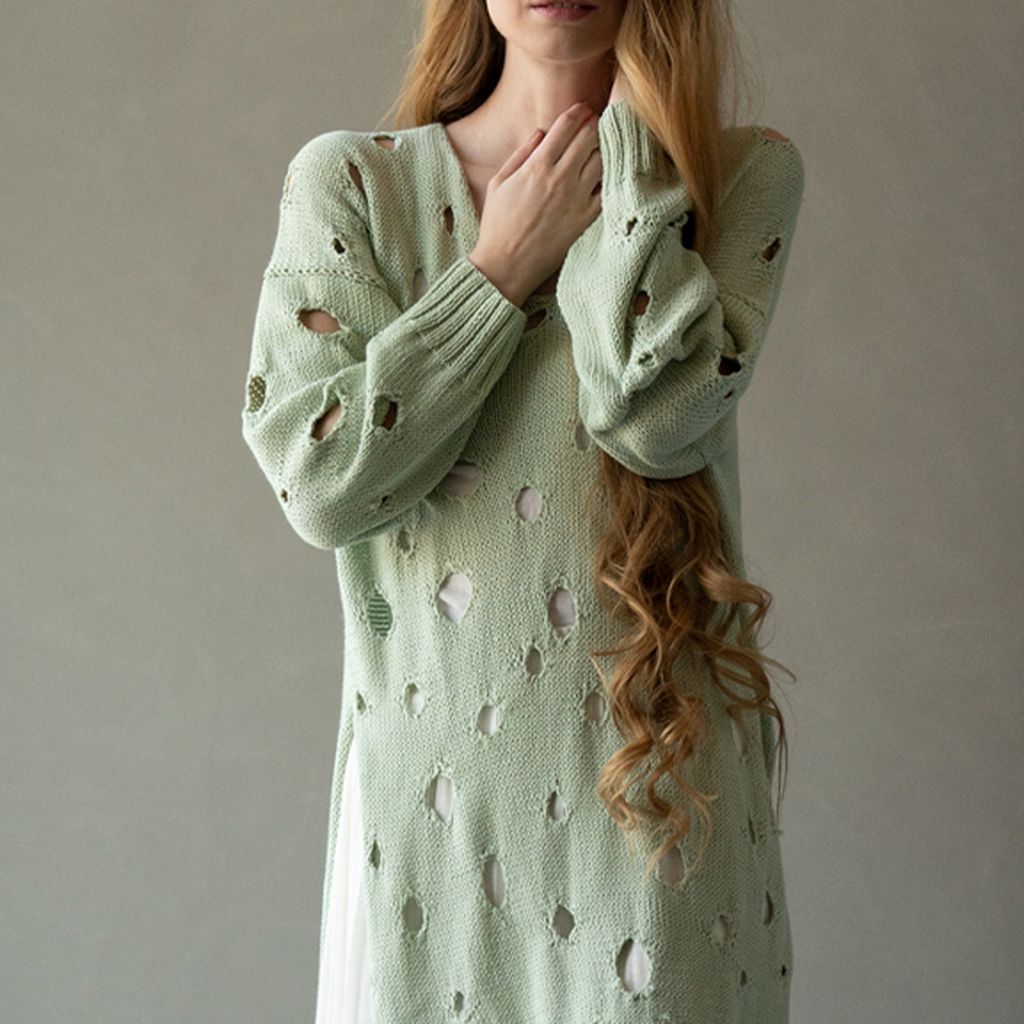
Holes: use a small ball of yarn for each hole you want to make.
Row 1°: * K2tog, SKP *, K 10 , rep**,K 20, continue rep** to create holes as desired until the end of the row.
Row 2° f. And all even rows: work in reverse stocking st on each section using the corresponding ball of yarn.
Rows 3°, 5° and 7°: work in stocking st, always decreasing on both sides of the previous decreases of each hole.
Row 9° f.: increase 1 st on both sides each hole.(increase = knit 2 sts in the same st).
On odd rows repeat Row 9° until the same number of cast-on sts is restored.
Note: using the same method, you can make smaller holes by working fewer rows or larger holes by working more rows; or make the decreases and increases on each row to create slightly different holes.
INSTRUCTIONS
FRONT
With 3.5 mm cast on 116 sts and work 16 rows in 2/2 rib st.
Rows 1° - 4°: work in stocking st
Rows 5° - 156°: work in stocking st, inserting the holes as desired.
In the next Row start shaping the neckline: divide the work in 2 sides and continue separately (58 sts. For the 1a side and 58 sts for the 2a side).
Left side
Row 157°: K, making 1 decrease (= K2tog) inside the first stitch on the side of the neckline and creating the holes as desired [57 sts]
Row 158°and all even rows: P, using the corresponding balls on the various sections between the holes.
Row 159°: K, using the corresponding balls on the various sections between the holes.
Continue this way making 1 decrease on neck-side on rows: 161, 165, 169, 173, 177, 181, 185, 189, 193, 197, 201, 205, 209.
Row 213°: cast off the 44 remaining sts.
Right side
Work as for the lesa side, making the decreases in a mirror image and working 1 SKP for each decrease.
BACK
With 3.5 mm cast on 116 sts and work 16 rows in 2/2 rib st.
Rows 1° - 212°: work in stocking st
213° f.: cast off all sts
SLEEVE
With 3.5 mm cast on 62 sts and work 22 rows in 2/2 rib st.
Rows 1° - 4°:work in stocking st
Rows 5° - 90: work in stocking st, inserting the holes as desired. At the same time increase 1 st ( after the first st on needle and before the last one) on rows: 5, 11, 17, 23, 29, 35, 41, 47, 53, 59, 65, 71, 77 e 83.
Note: increases = make one by picking up the thread between two stitches and knitting into the back of the new stitch.
Row 91°: cast off all sts
Make the second sleeve.
FINISHING
On WS, sew shoulders, sew the top edge of each sleeve to the sides of the 2 joined panels (front and back).
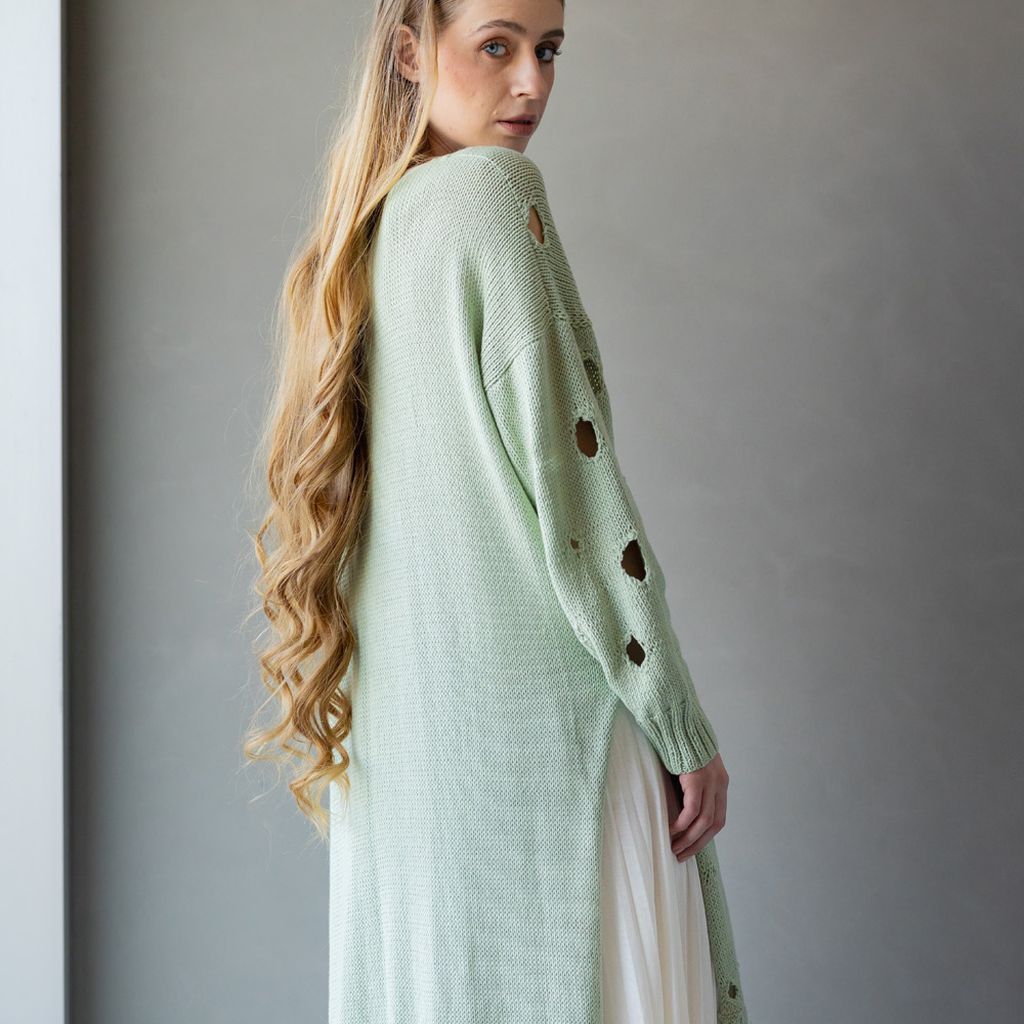
For each sleeve, place the center of the top edge at the shoulder seam, then pin the first half of the edge on the first panel side and the second half on the second panel side, then sew in place. Then sew the underarm and the sides leaving the last 40 cm open to create the side slits as shown in the photo. Weave in all ends.
BULKY SWEATER
MATERIAL
YARN = “Baby Soft” by “Laines du Nord”: 9 balls of 50 gr, color 502
NEEDLES = 3.5 and 4 mm
OTHER = tapestry needle, scissor, pins.
SHARE
ABBREVIATIONS
RS = right side
WS = wrong side
st(s) = stitch(es)
R = row
K = knit
P = purl
SKP = slip 1, K1, pass slipped stitch over
K2tog = knit 2 sts together
rep ** = repeat from * to *
NOTES
Difficulty level: Intermediate
Slip without working it the 1a st of each RS row.
MEASURES
SIZE M (this pattern is designed to be worn with a positive ease)
POINTS USED
2/2 rib st, stoking st
Holes: use a small ball of yarn for each hole you want to make.
Row 1°: * K2tog, SKP *, K 10 , rep**,K 20, continue rep** to create holes as desired until the end of the row.
Row 2° f. And all even rows: work in reverse stocking st on each section using the corresponding ball of yarn.
Rows 3°, 5° and 7°: work in stocking st, always decreasing on both sides of the previous decreases of each hole.
Row 9° f.: increase 1 st on both sides each hole.(increase = knit 2 sts in the same st).
On odd rows repeat Row 9° until the same number of cast-on sts is restored.
Note: using the same method, you can make smaller holes by working fewer rows or larger holes by working more rows; or make the decreases and increases on each row to create slightly different holes.
INSTRUCTIONS
FRONT
With 3.5 mm cast on 116 sts and work 16 rows in 2/2 rib st.
Rows 1° - 4°: work in stocking st
Rows 5° - 156°: work in stocking st, inserting the holes as desired.
In the next Row start shaping the neckline: divide the work in 2 sides and continue separately (58 sts. For the 1a side and 58 sts for the 2a side).
Left side
Row 157°: K, making 1 decrease (= K2tog) inside the first stitch on the side of the neckline and creating the holes as desired [57 sts]
Row 158°and all even rows: P, using the corresponding balls on the various sections between the holes.
Row 159°: K, using the corresponding balls on the various sections between the holes.
Continue this way making 1 decrease on neck-side on rows: 161, 165, 169, 173, 177, 181, 185, 189, 193, 197, 201, 205, 209.
Row 213°: cast off the 44 remaining sts.
Right side
Work as for the lesa side, making the decreases in a mirror image and working 1 SKP for each decrease.
BACK
With 3.5 mm cast on 116 sts and work 16 rows in 2/2 rib st.
Rows 1° - 212°: work in stocking st
213° f.: cast off all sts
SLEEVE
With 3.5 mm cast on 62 sts and work 22 rows in 2/2 rib st.
Rows 1° - 4°:work in stocking st
Rows 5° - 90: work in stocking st, inserting the holes as desired. At the same time increase 1 st ( after the first st on needle and before the last one) on rows: 5, 11, 17, 23, 29, 35, 41, 47, 53, 59, 65, 71, 77 e 83.
Note: increases = make one by picking up the thread between two stitches and knitting into the back of the new stitch.
Row 91°: cast off all sts
Make the second sleeve.
FINISHING
On WS, sew shoulders, sew the top edge of each sleeve to the sides of the 2 joined panels (front and back).
For each sleeve, place the center of the top edge at the shoulder seam, then pin the first half of the edge on the first panel side and the second half on the second panel side, then sew in place. Then sew the underarm and the sides leaving the last 40 cm open to create the side slits as shown in the photo. Weave in all ends.