
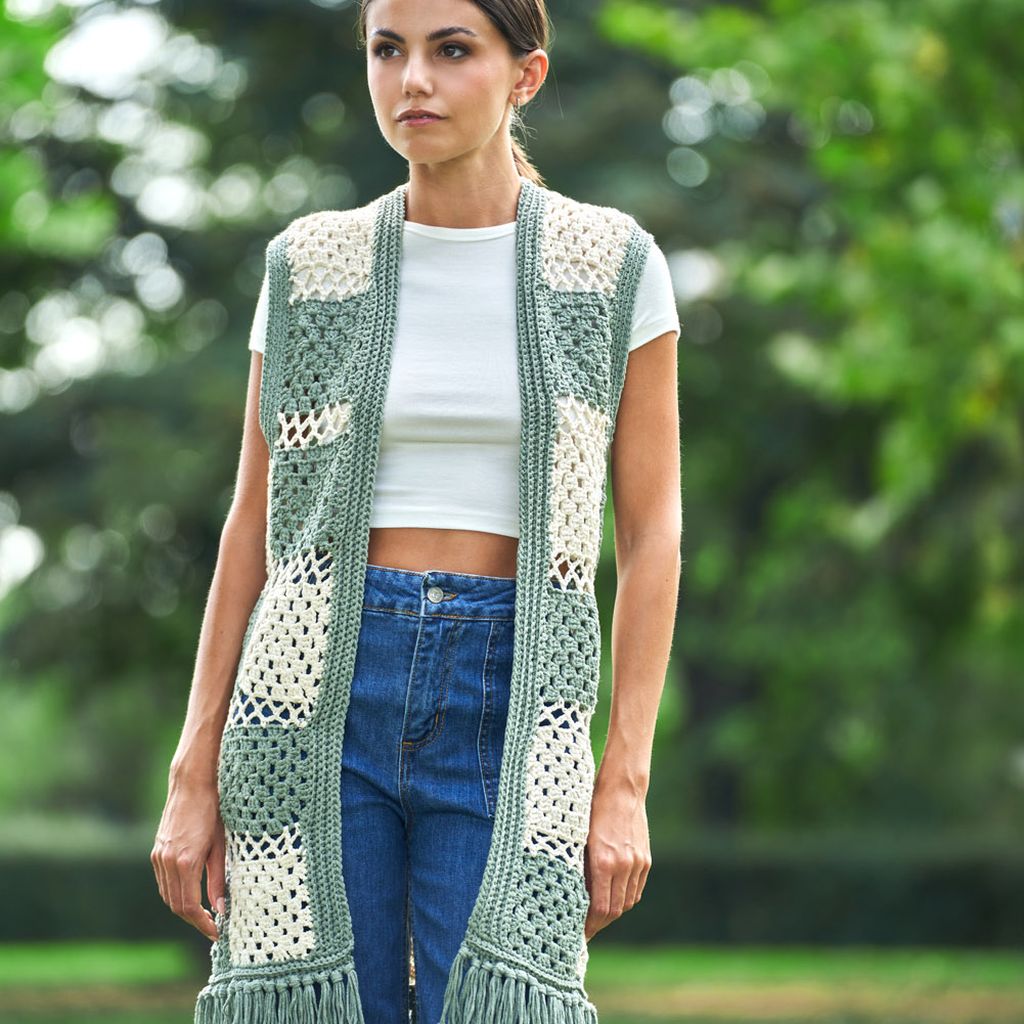

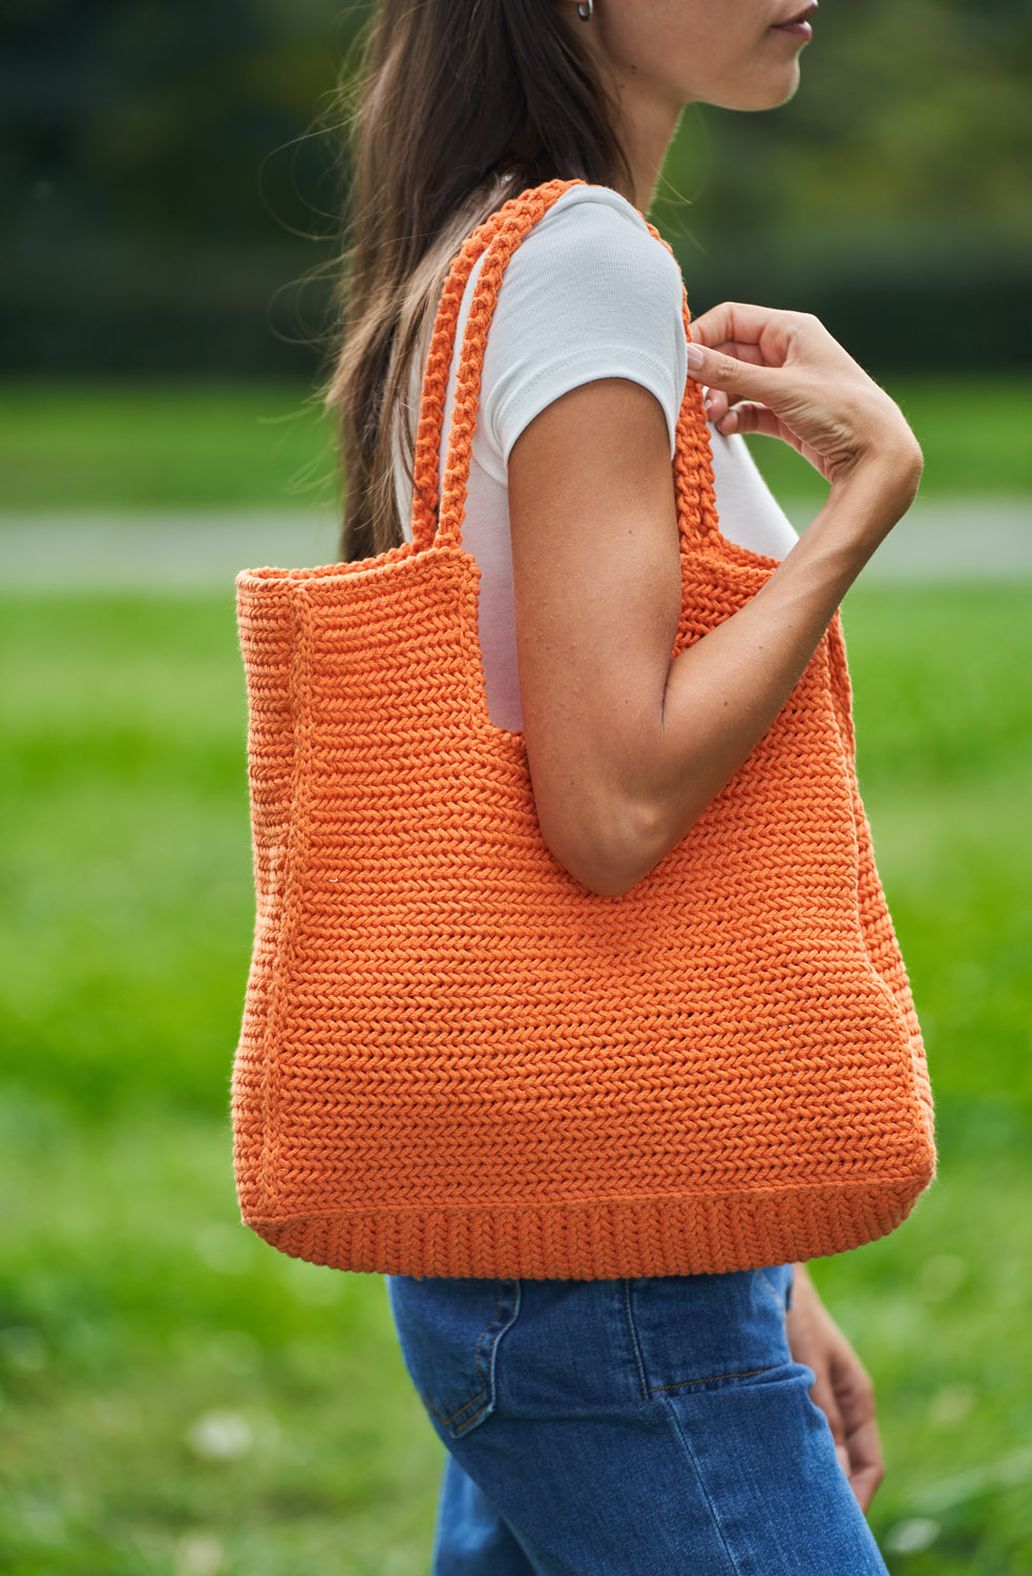
ECO CROCHET VEST
YARN = ECO CROCHET by LAINES DU NORD as foll.: 250 grams of cream col. n. 11; 300 grams of dark green sage col. n. 13
CROCHET-HOOK = size 4 mm or suited to this yarn
OTHERS = ribbon needle, stitch marker, scissors, tape measure.
SKILL LEVEL: Easy
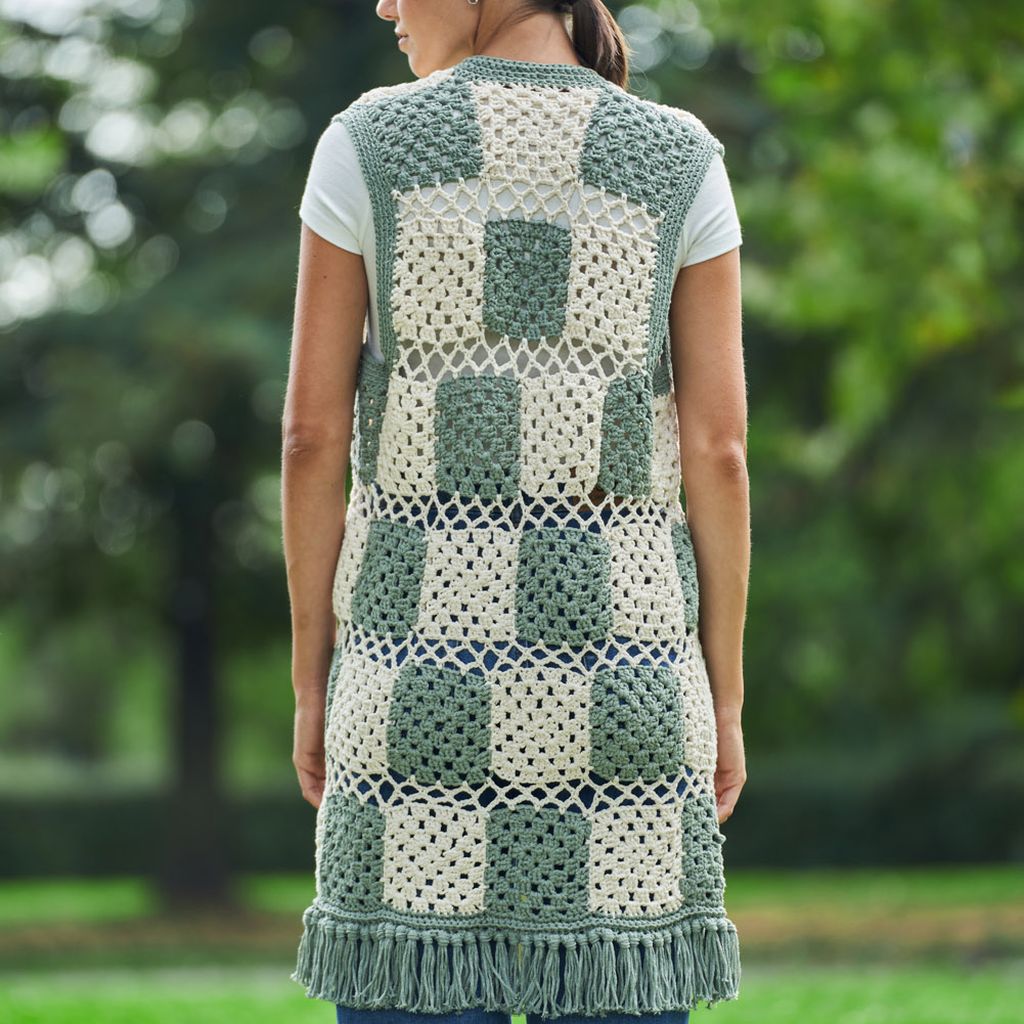
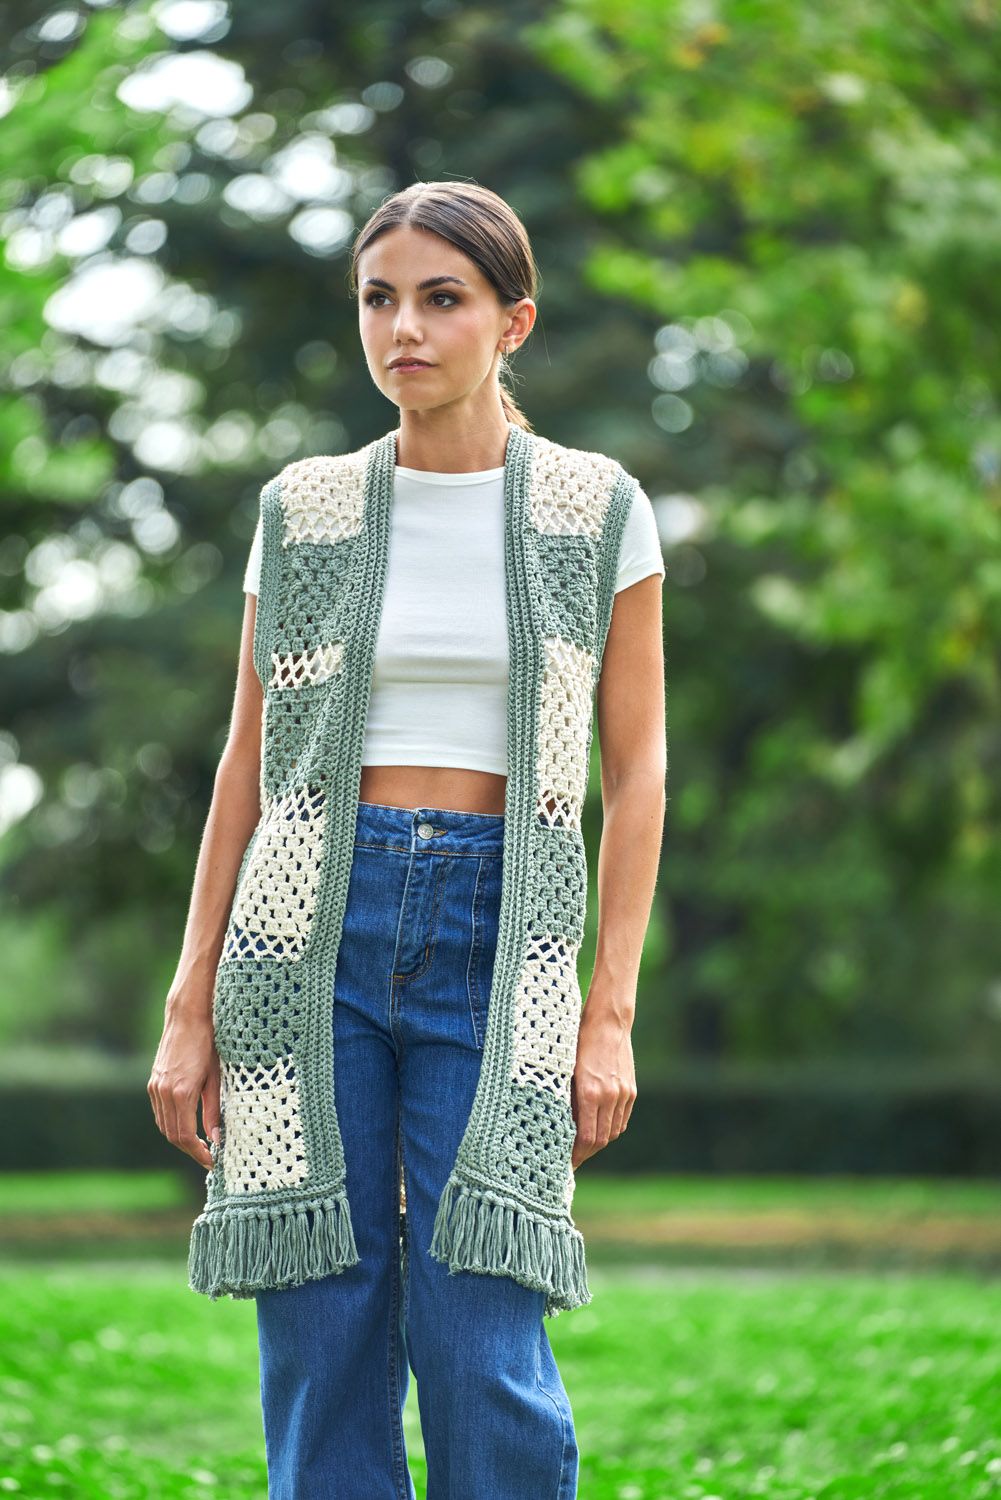
The vest consists of 42 granny motifs worked separately and then joined together.
Chain stitch, slip stitch, single crochet, double crochet.
Back post single crochet: insert the hook into back thread of 1 base stitch and work 1 single crochet.
RS = right side of work
WS = wrong side of work
st. / es = stitch / es
ch = chain stitch
col. = color
tog. = together
sl st = slip stitch
sc = single crochet
dc = double crochet
BPsc = Back post single crochet
rep. = repeat
foll. = follow / ing
Vest: total width (front back front): 88 cm; total height without the fringes: 73 cm
1 granny A motif: 10 x 10 cm
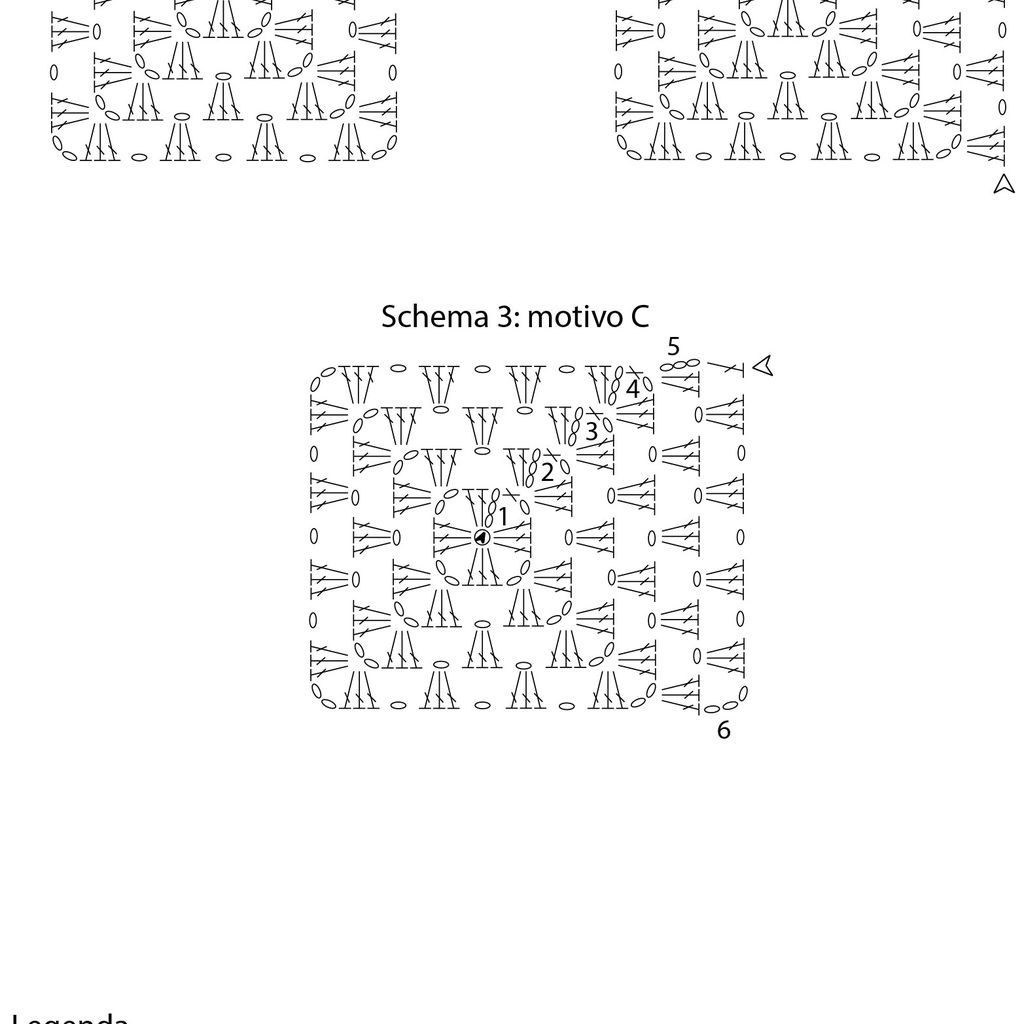
Procedure
Work 42 granny motifs as follow:
- 30 motifs A following the diagram 1; 15 with cream col. and 15 with green col.
- 6 motifs B following the diagram 2; 4 with cream col. and 2 with green col.
- 6 motifs C following the diagram 3; 2 with cream col. and 4 with green col.
ASSEMBLING
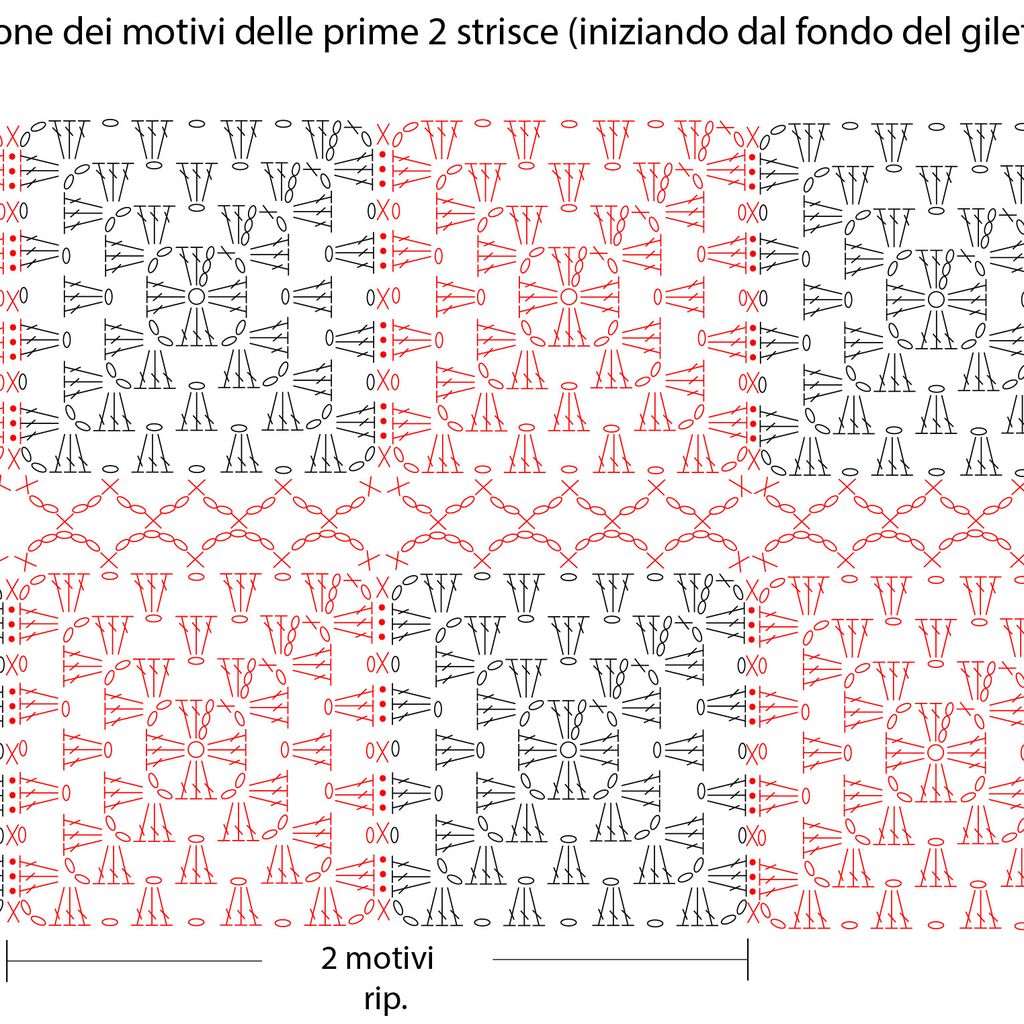
Joining of the motifs
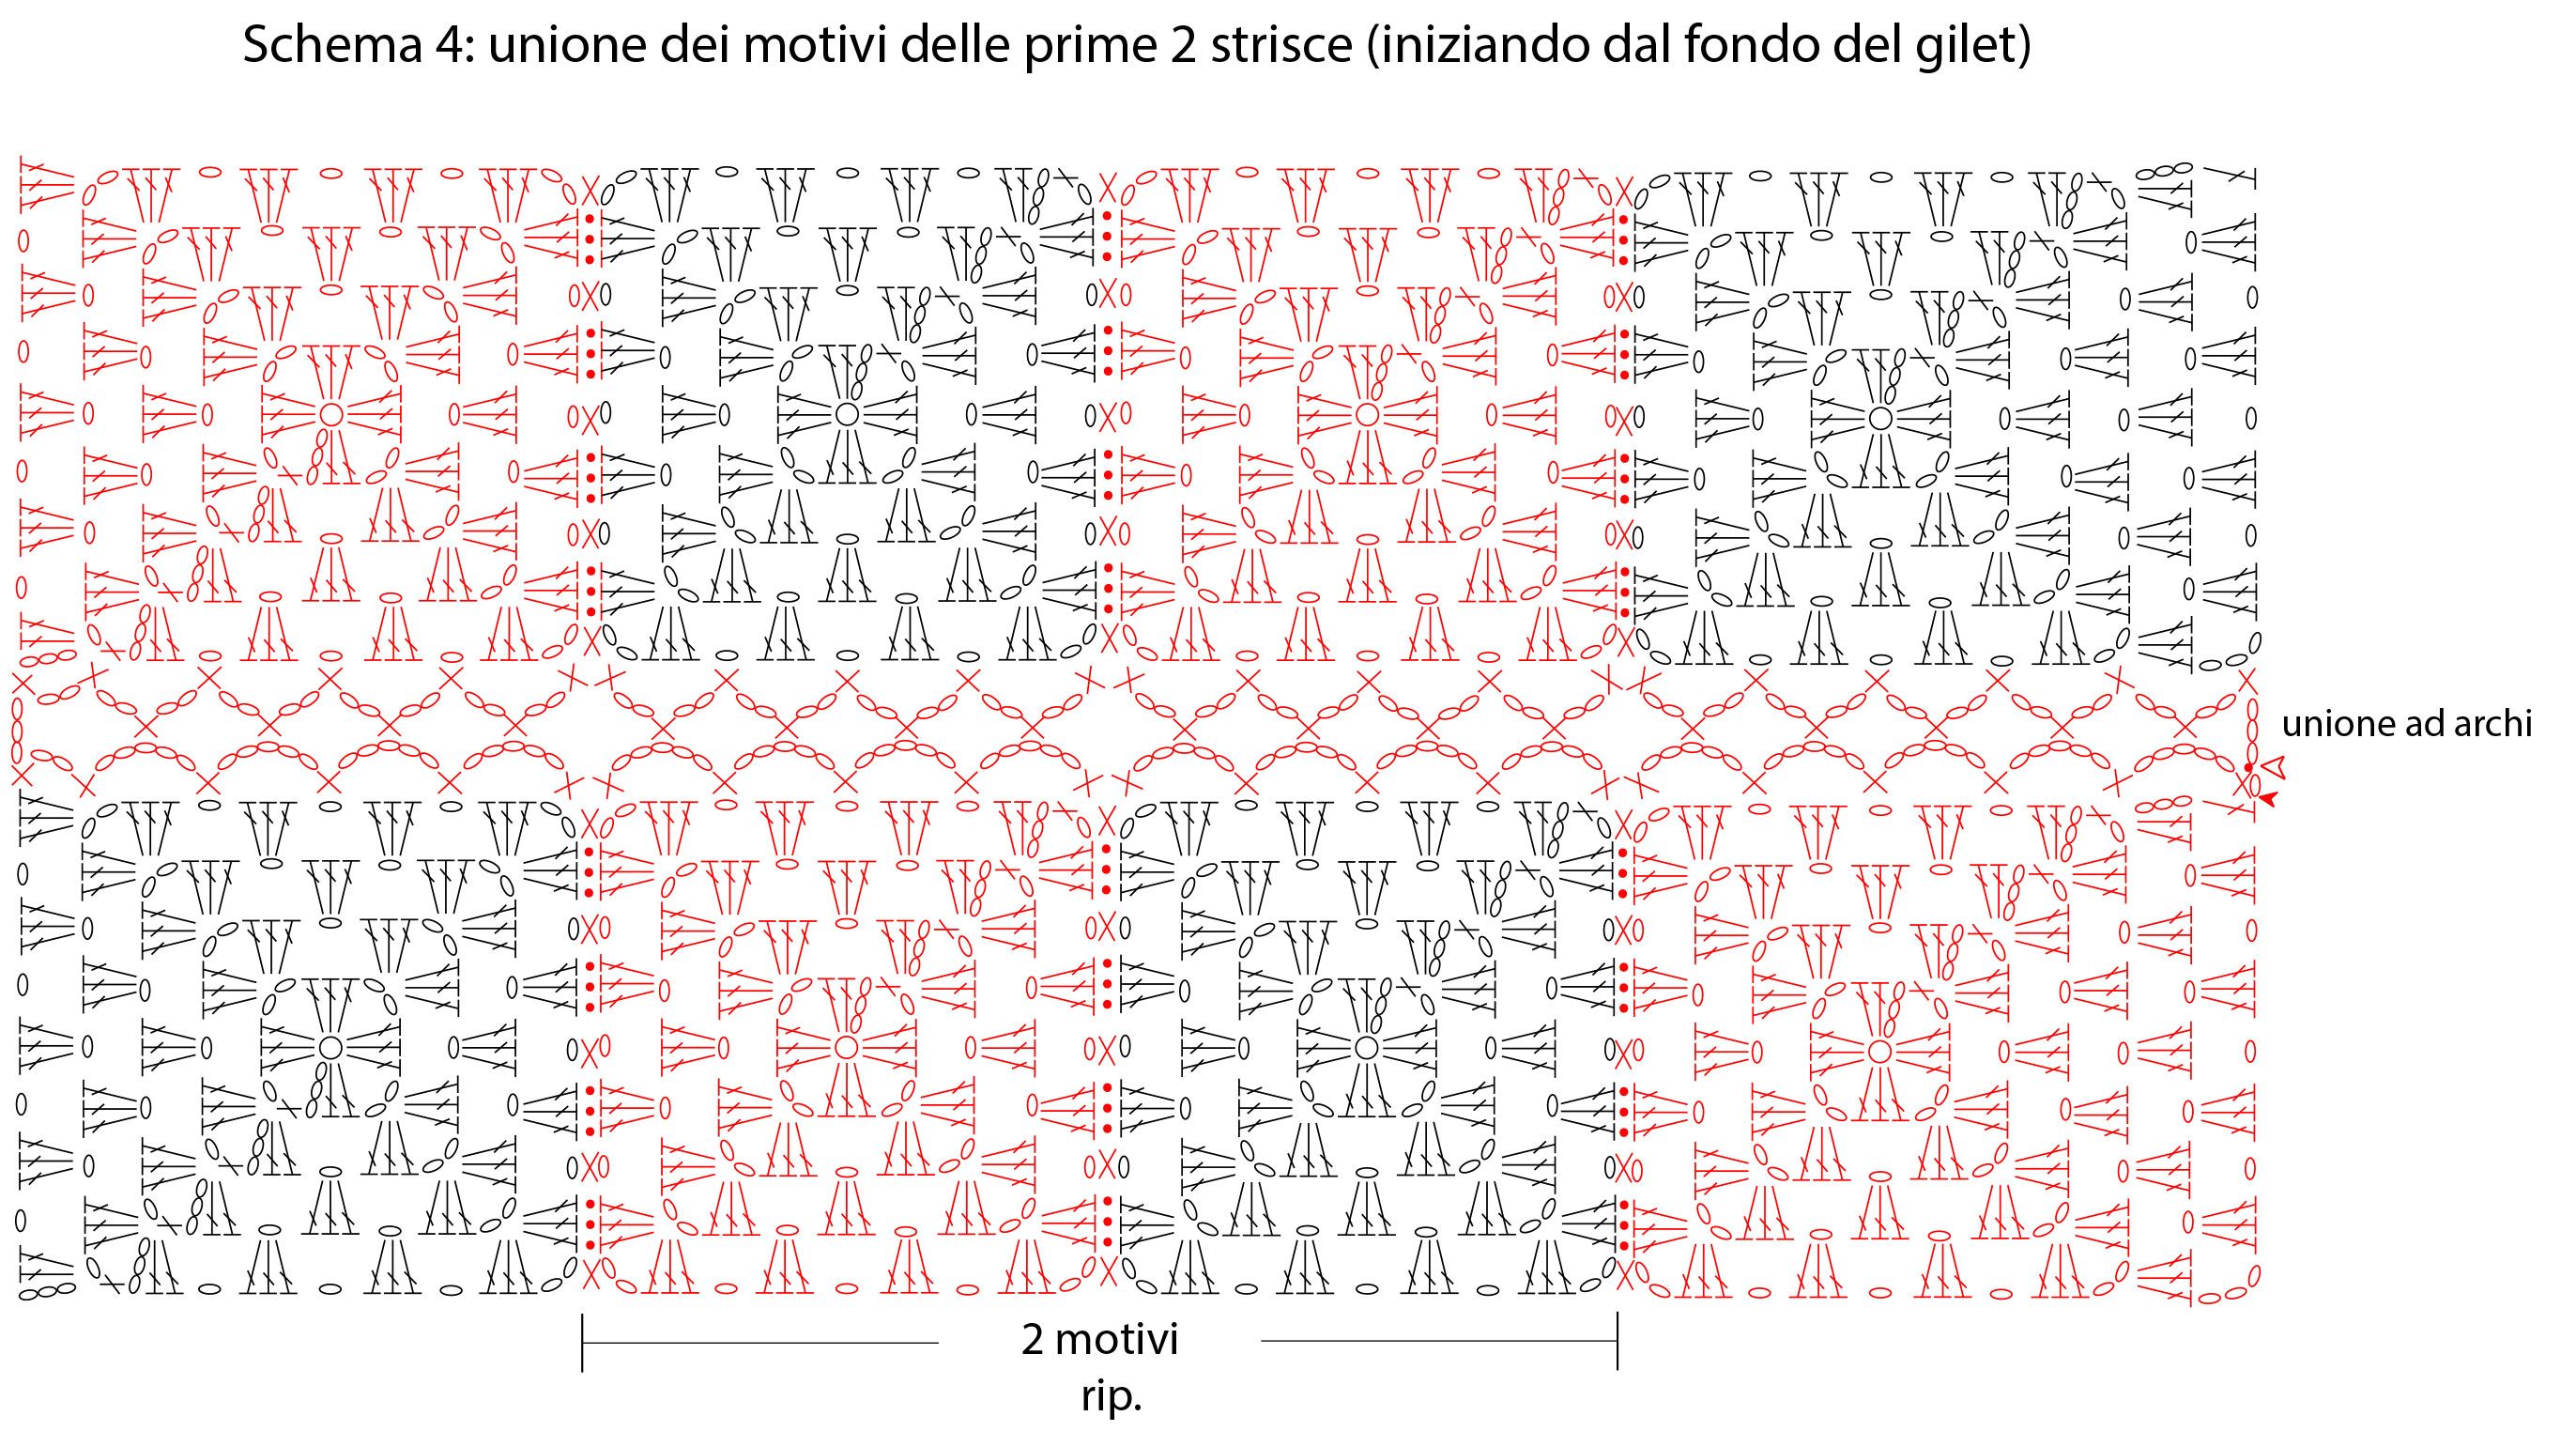
Beginning from bottom, shape one stripe consisting of 8 motifs, according to diagram 4. Every time, place 1 cream motif over 1 green motif (RS against RS) then, beginning from one corner, join them along one side (diagram): using white yarn, insert the hook through the right corner of both motifs and work 1 sc, *1 sl st only in the back thread (or outer) of each of next 3 dc of both motifs, 1 sc in 1-ch-space of both motifs *, rep. from * to *, until next corner included, cut and tie off the yarn.
For joining the motifs of second stripe, rep. following the diagram 4.
Joining of the stripes
Using the white yarn, join the long sides corresponding to first 2 stripes, working 1 round of arches and sc like shown by diagram 4.
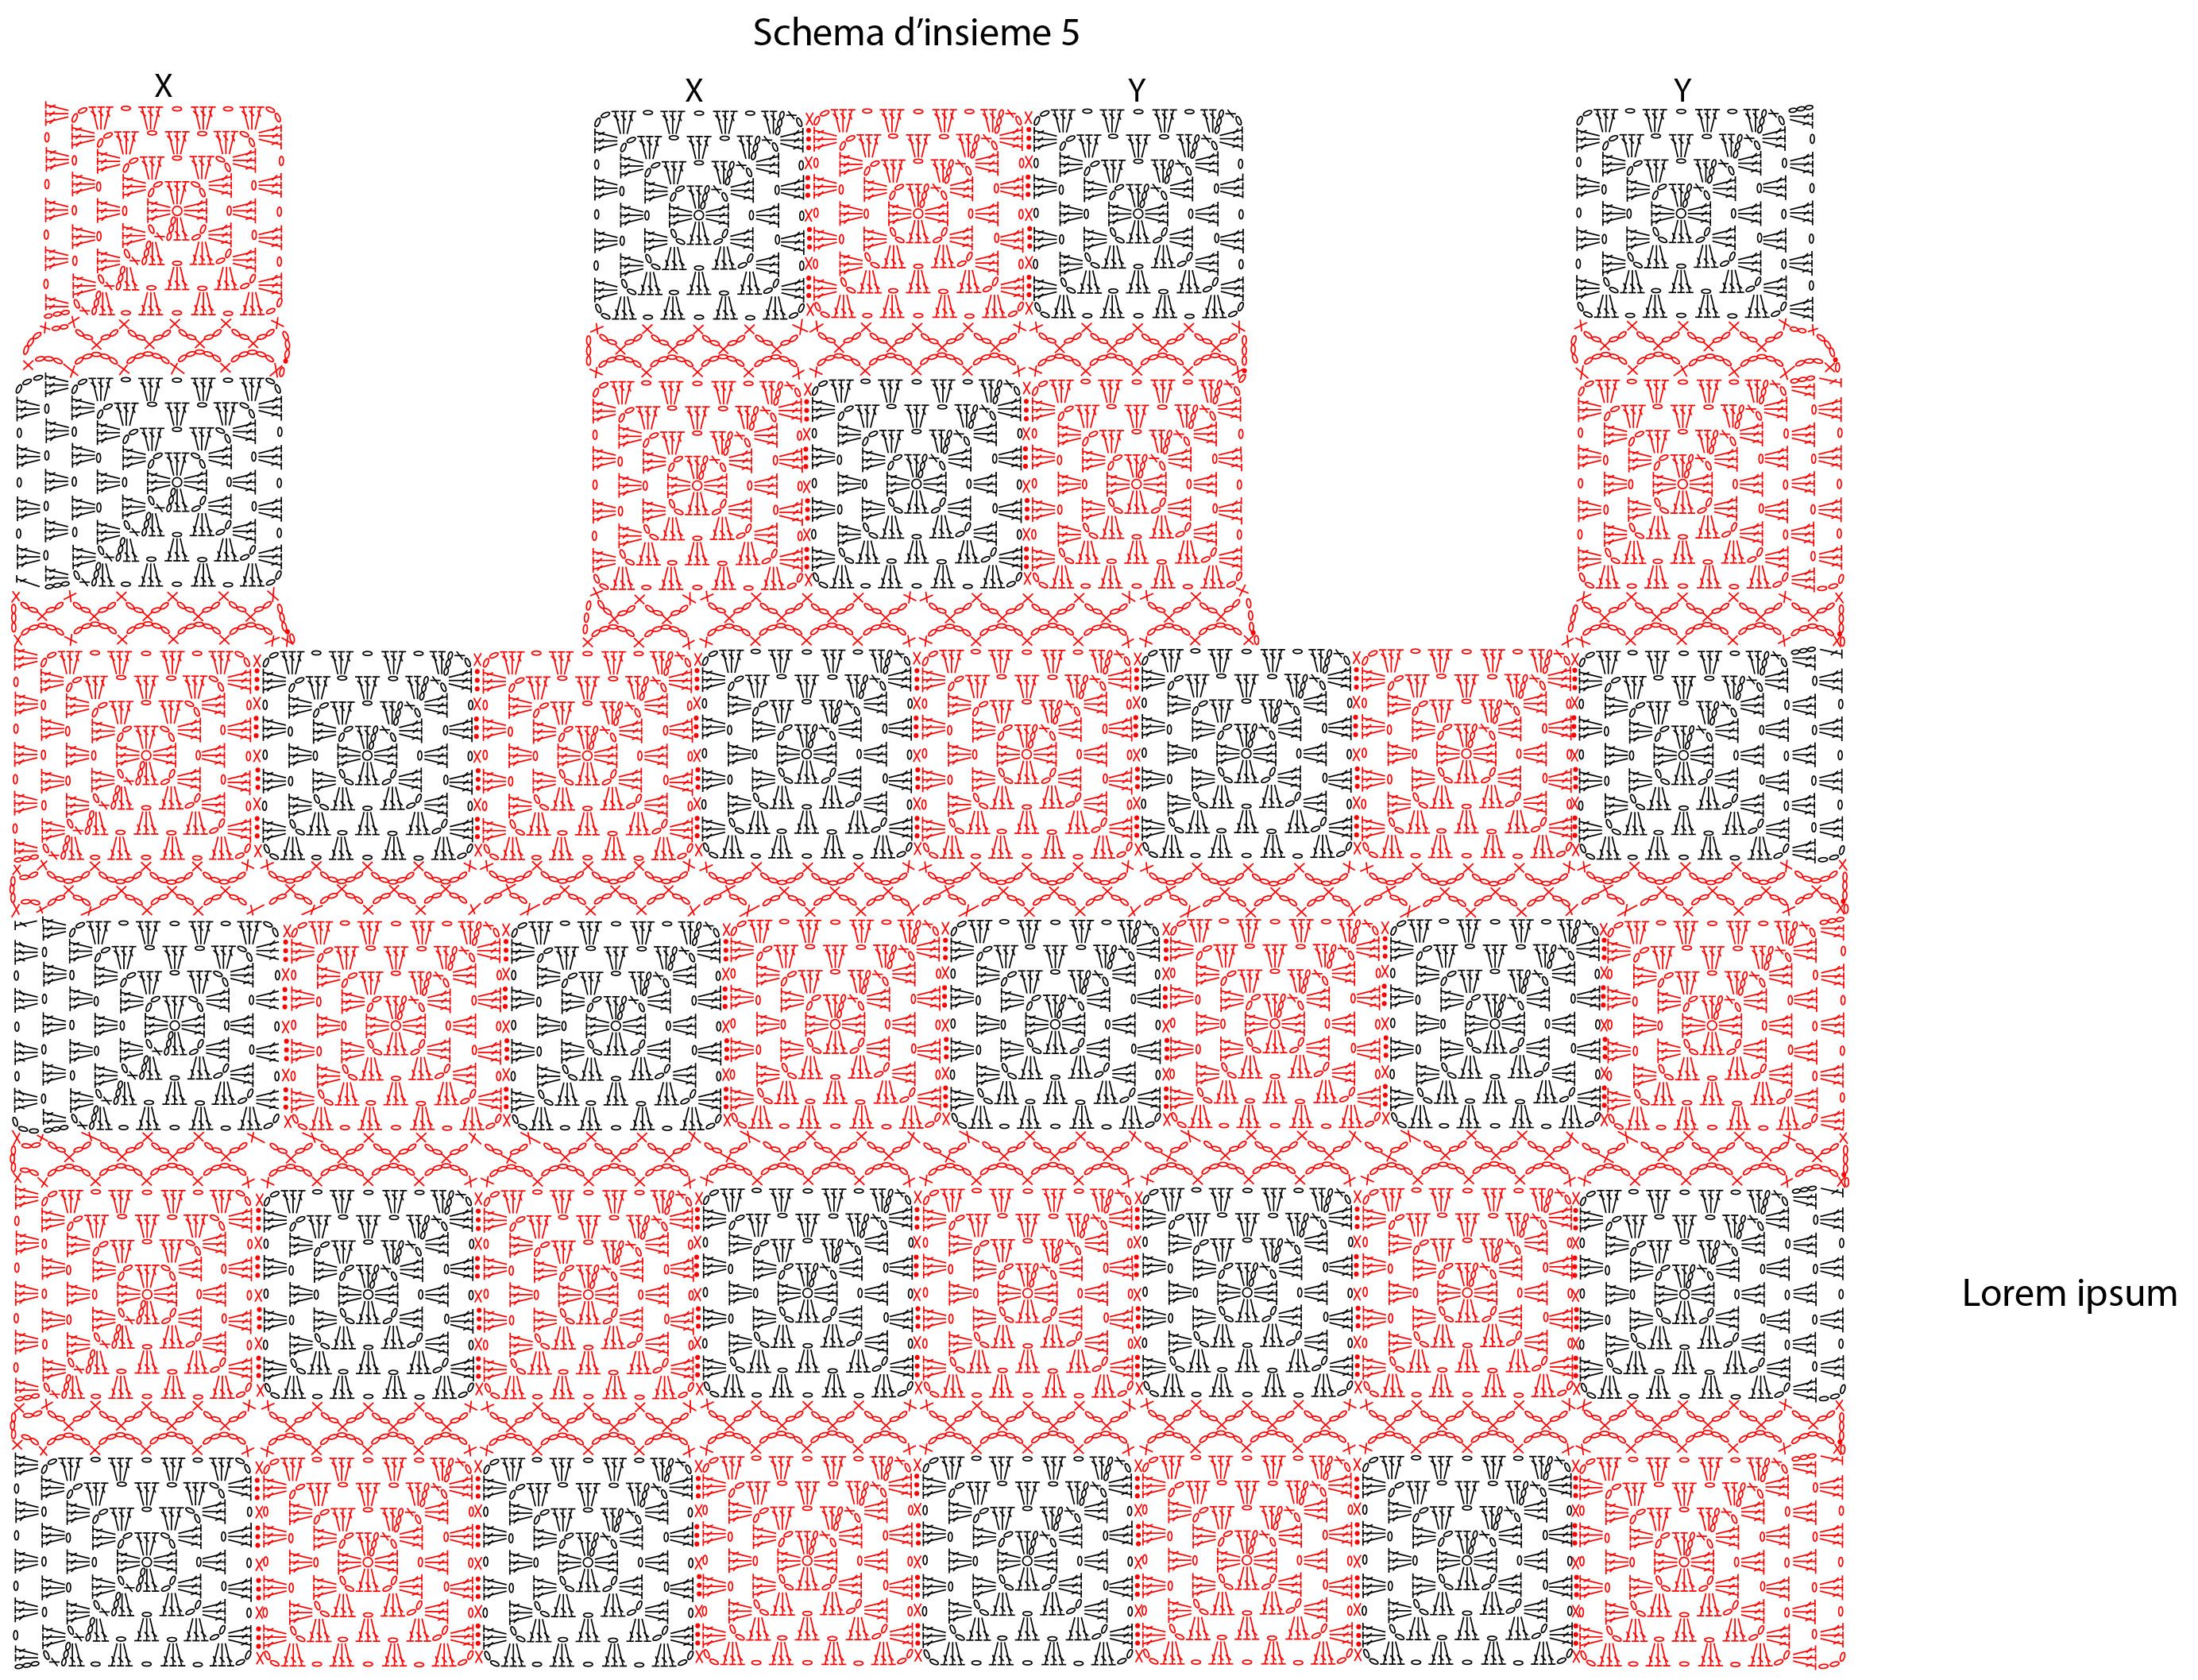
Continue assembling the motifs and the stripes following the diagram 5, considering that across some arches-joining-rounds the position of sc and arches is offset; you can follow the diagram 5 or arrange the joining-round as you prefer.
FINISHING
To close the shoulders, after the assembling of all motifs, join the motifs X with X and Y with Y; use the same method as you have joined the motifs. The joining of the shoulders shapes the armholes.
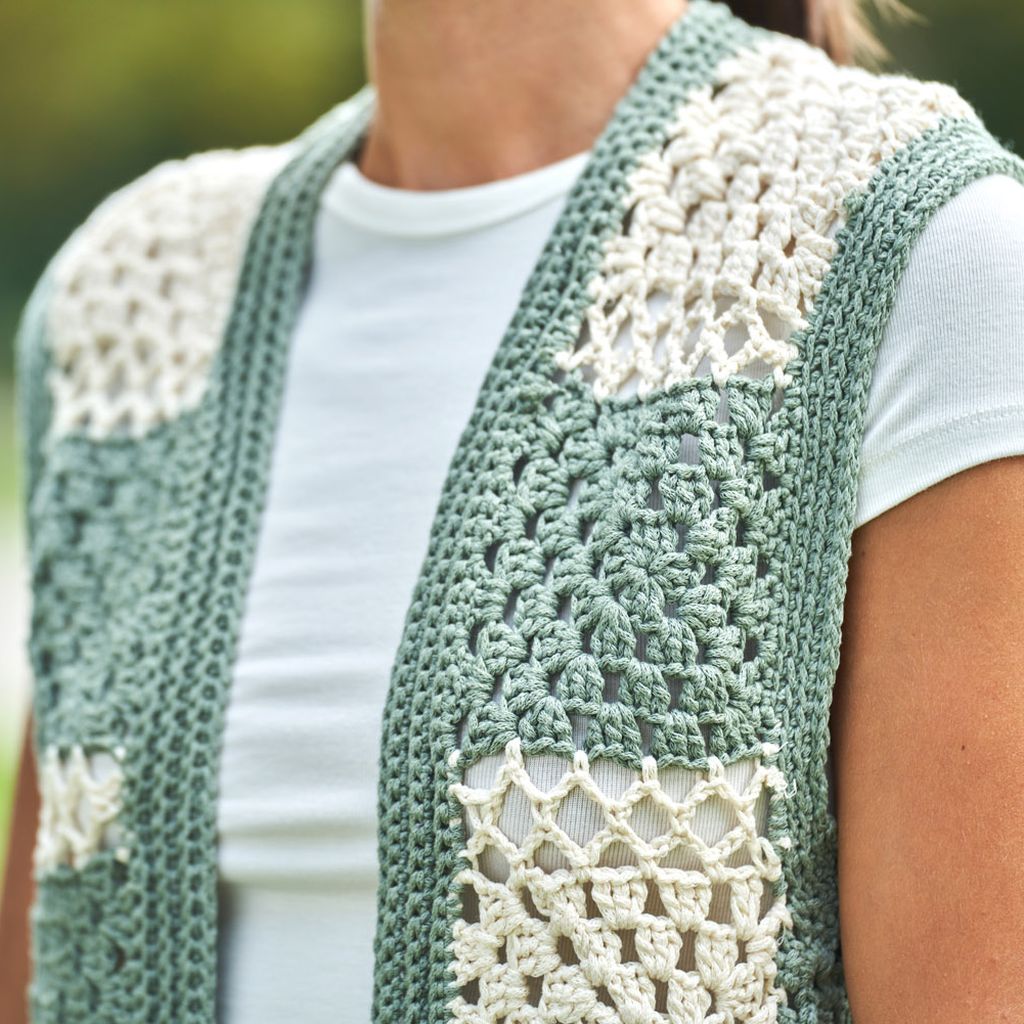
Opening band of 2 fronts and back neckline
1st row (WS): on WS, join the green yarn in the lower corner-space of the left front and work 1 sc in each st. and 1-cc-space along the long edge of left front, back neckline and right front, 1 turning-ch (do not consider the turning-ch like st.).
2nd row (RS): 1 BPsc in each st. of the row, 1 turning ch.
From 3rd to 6th row: rep. 2nd row, 1 turning ch.
7th row: 1 sl st in each st. of the round. Cut and tie off the yarn.
Lower band of the vest
1st row (RS): on RS, join the green yarn in lower corner of left front and, along bottom of vest, work 1 sc in each st. and 1-ch-space, 1 turning ch.
2nd row (WS): 1 BPsc in each st. of the row, 1 turning ch.
3rd and 4rh row: rep. 2nd row. Cut and tie off the yarn.
Armholes bands
1st round (RS): join green yarn in one of two lower corners of one armhole and work 1 round in sc around the circumference of the armhole; 1 sl st in 1st sc of the round.
From 2nd to 3rd round (RS): 1 ch (do not consider it like stitch) 1 BPsc into the same base st. of the ch, in each st. of the round, 1 sl st in 1st sc of the round.
4th round: 1 sl st in each st. of the round. Cut and tie off the yarn.
Work second armhole band as given for first one.
Fringes
Give the finishing touch at lower edge, joining some fringes. Shape every fringe as foll.: prepare 8 pieces of green yarn of 18 cm in length, group and fold them in half, insert the hook into 1st st. of lower edge, hook the folding point and pull it through the st., shaping a loop, pass the ends of the threads through the loop and pull hardly tightening the knot around the base st., fixing the fringe in its position. * Skip 1 base st. and place 1 fringe in next st. *, rep. from * to *, along the lower edge. Use the scissors to make the length of the fringes as you like.

