

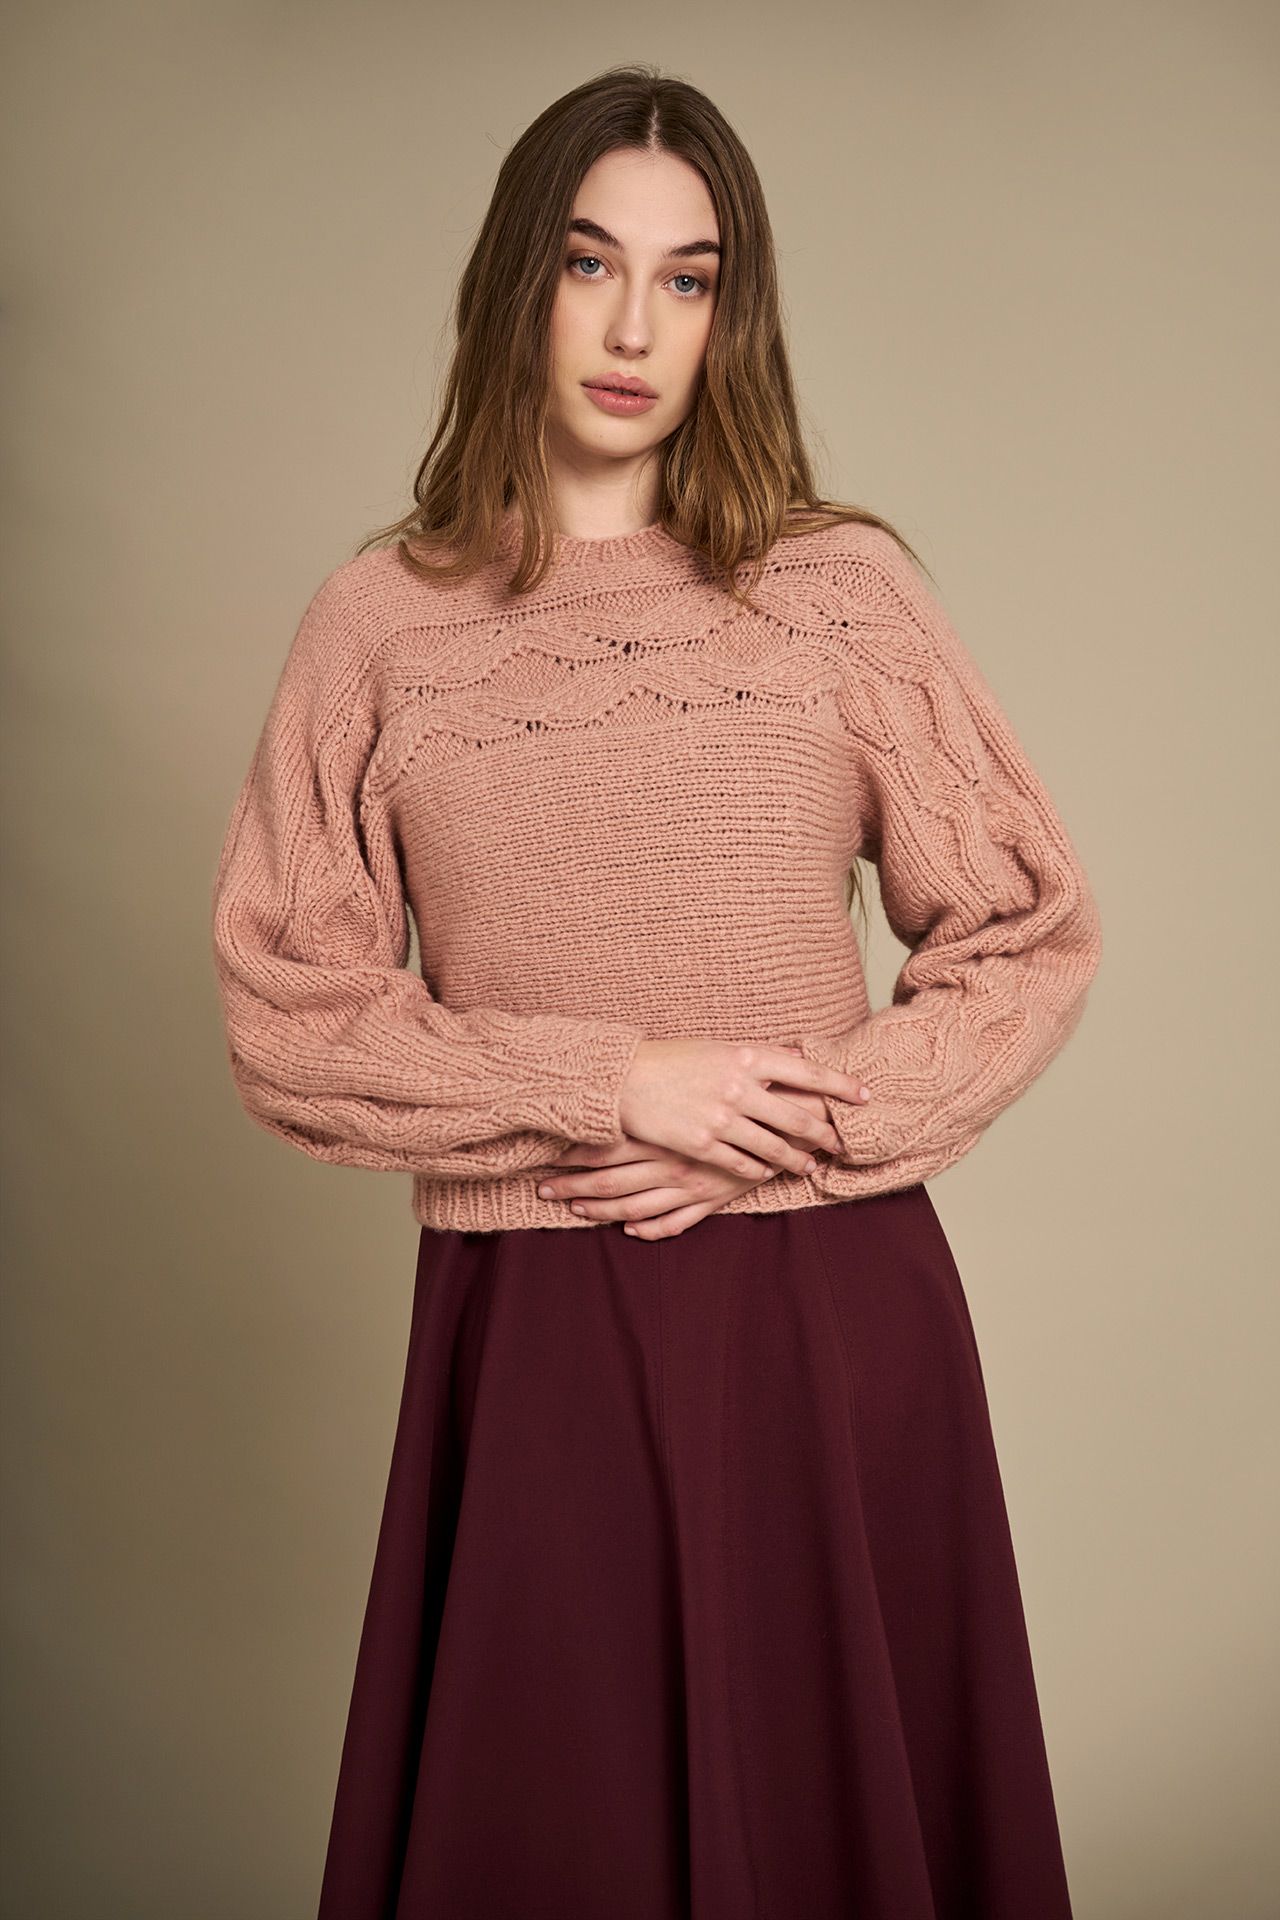
ROZENA CABLE SWEATER
DIFFICULTY = Hard
YARN: ROZENA by Laines du Nord, 10 balls, col. 3022
INTERCHANGEABLE CIRCULAR NEEDLES: sizes 6 mm and 7mm, 40 cm and 80 cm cables.
OTHERS: darning needle with silicone eye, stitch marker, pins, scissors, measuring tape.
NOTES
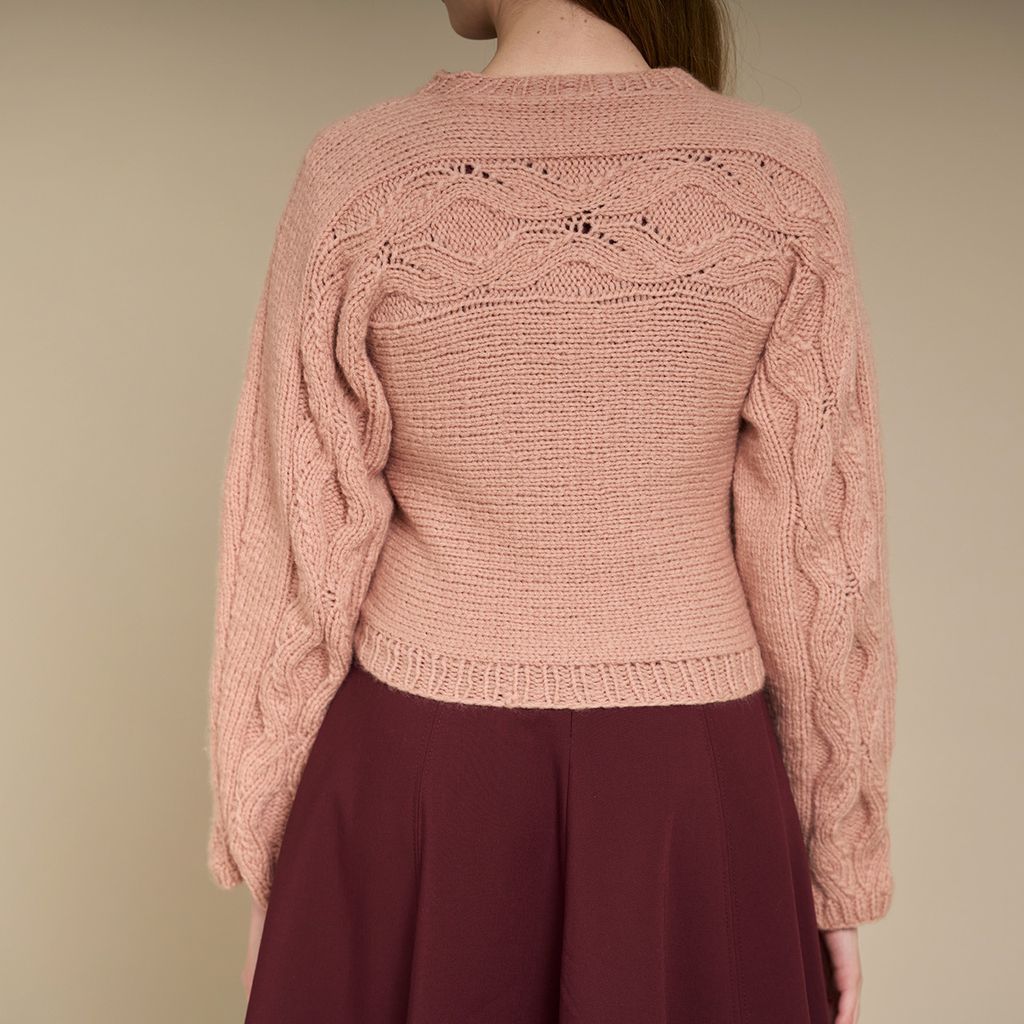
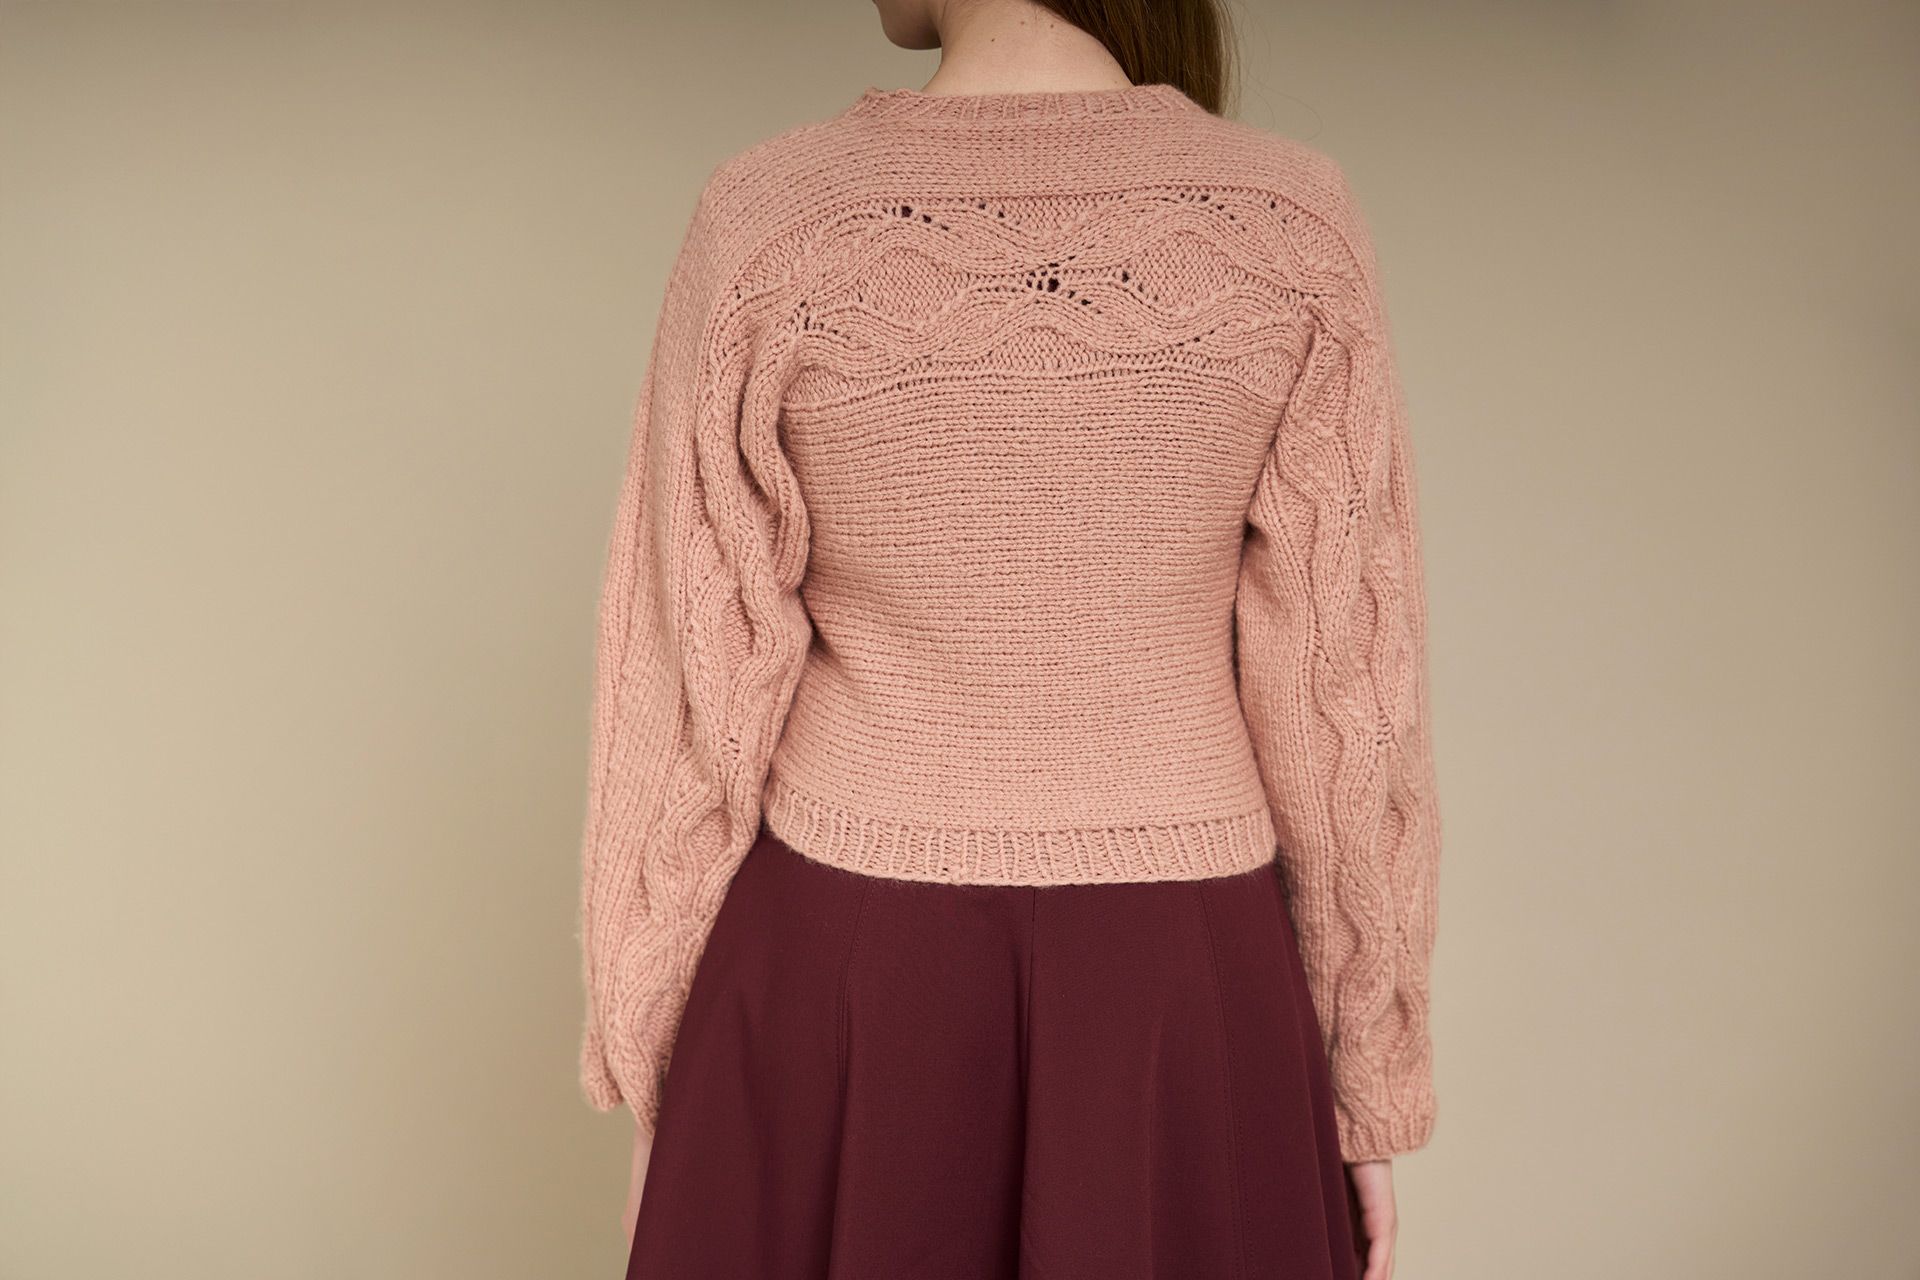
The garment is made up of two identical panels: one forms the front and the front halves of the sleeves, and the other forms the back and back
halves of the sleeves. Each panel is worked from one sleeve cuff across the body to the opposite sleeve cuff. Maintain 1 selvage stitch at each edge of every row, even when not specifically indicated: slip the first stitch of every row as it appears, without working it.
TENSION
10 x 10 cm = 15 sts and 21 r in stockinette st using size 7 mm knitting needles.
If your tension doesn’t match, try a different needle size.
STITCHES USED
Stockinette stitch: on RS rows: knit; on WS rows: purl.
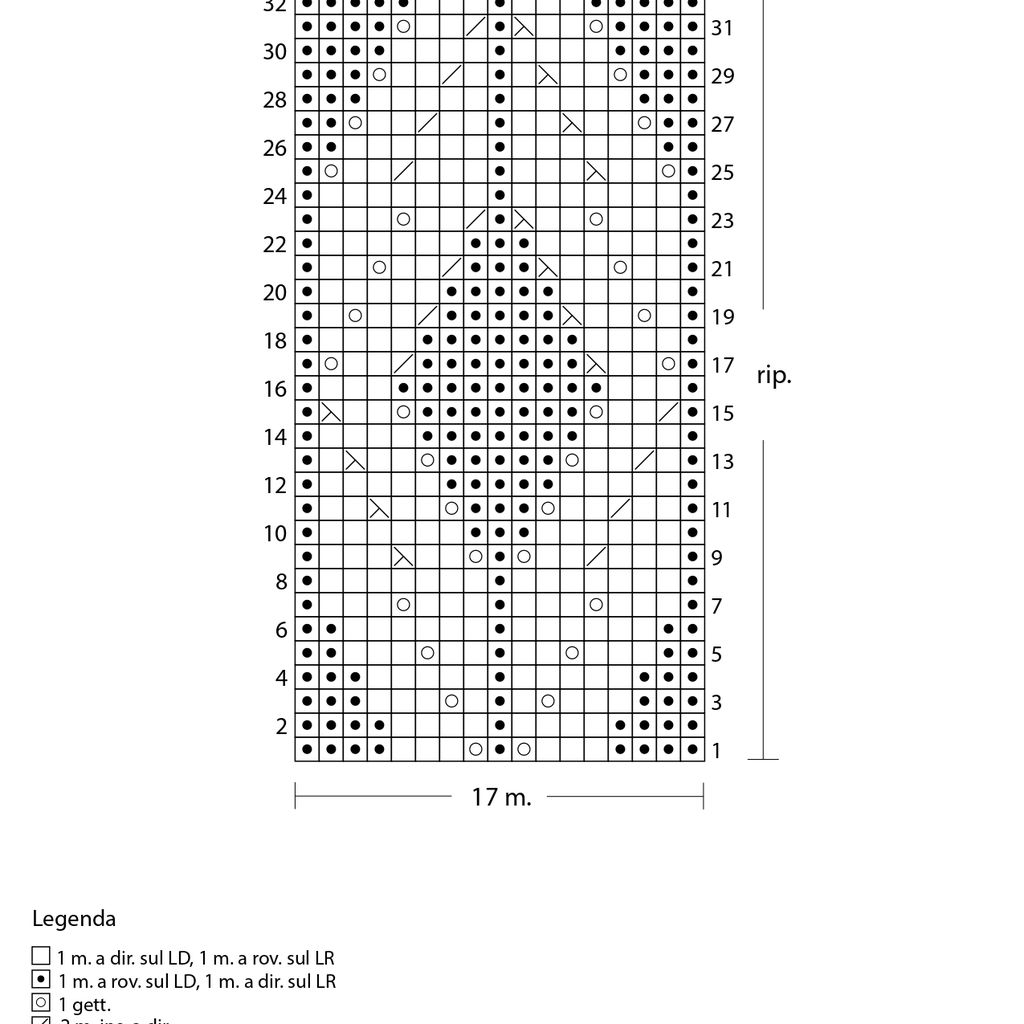
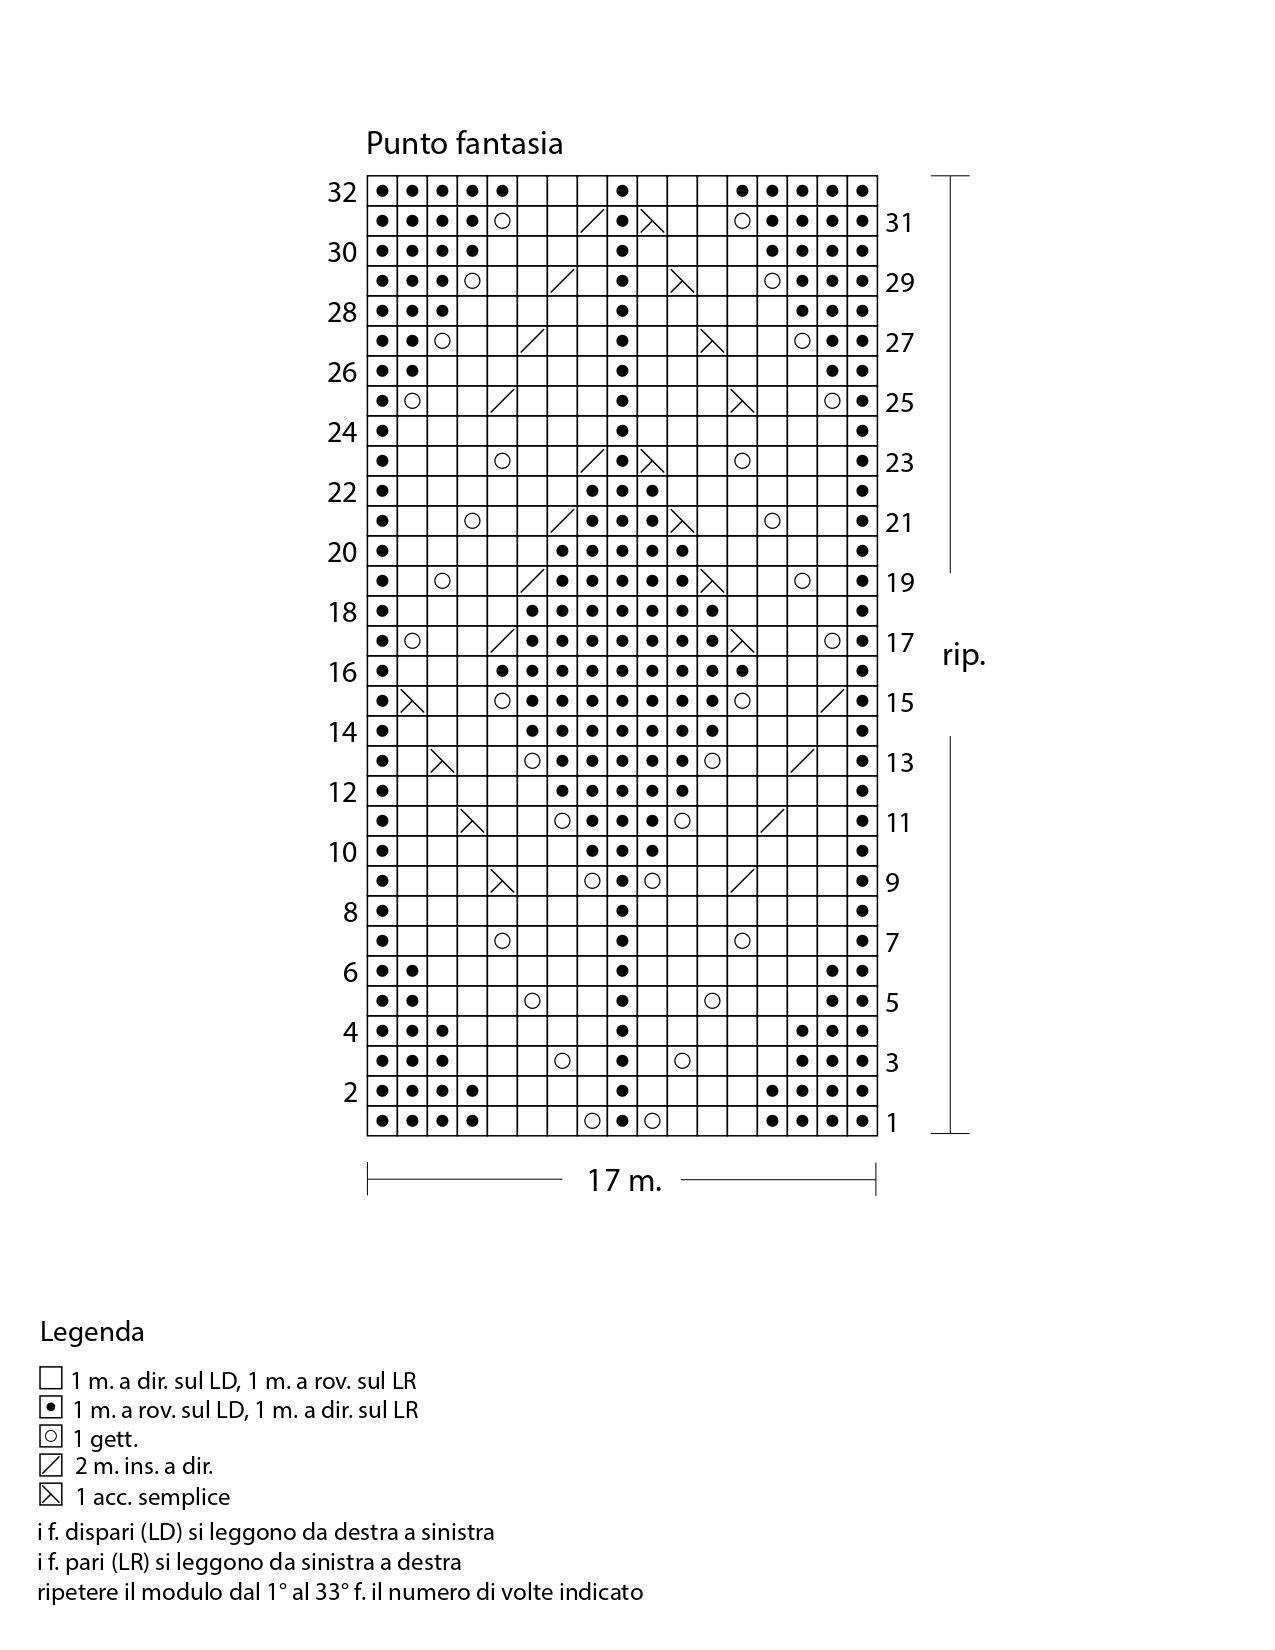
Cable pattern: worked over a multiple of 17 sts, following the diagram. Repeat rows 1 to 32 until the required length is reached.
1x1 Rib: row 1: k1, p1 to end. Following rows: work stitches as they appear.
Joining to work in the round: slip the first stitch from the left needle to the right needle purl-wise, pass the last cast-on stitch over the slipped
stitch and off the needle. Pull the cast-on tail to tighten the join. Place a marker to indicate the beginning of the round and be sure to move the
marker up at the end of each round.
ABBREVIATIONS
RS = right side of the work
WS = wrong side of the work
BOR = beginning of round marker
st(s) = stitch(es)
skp = slip 1, knit 1, pass slipped stitch over
incr = increase / ing
col.= color
decr = decrease
k = knit
p = purl
yo = yarn over
tog = together
bind off = bind off the stitches using the skp technique
rep = repeat / ing
foll = follow / ing
SIZE S/M
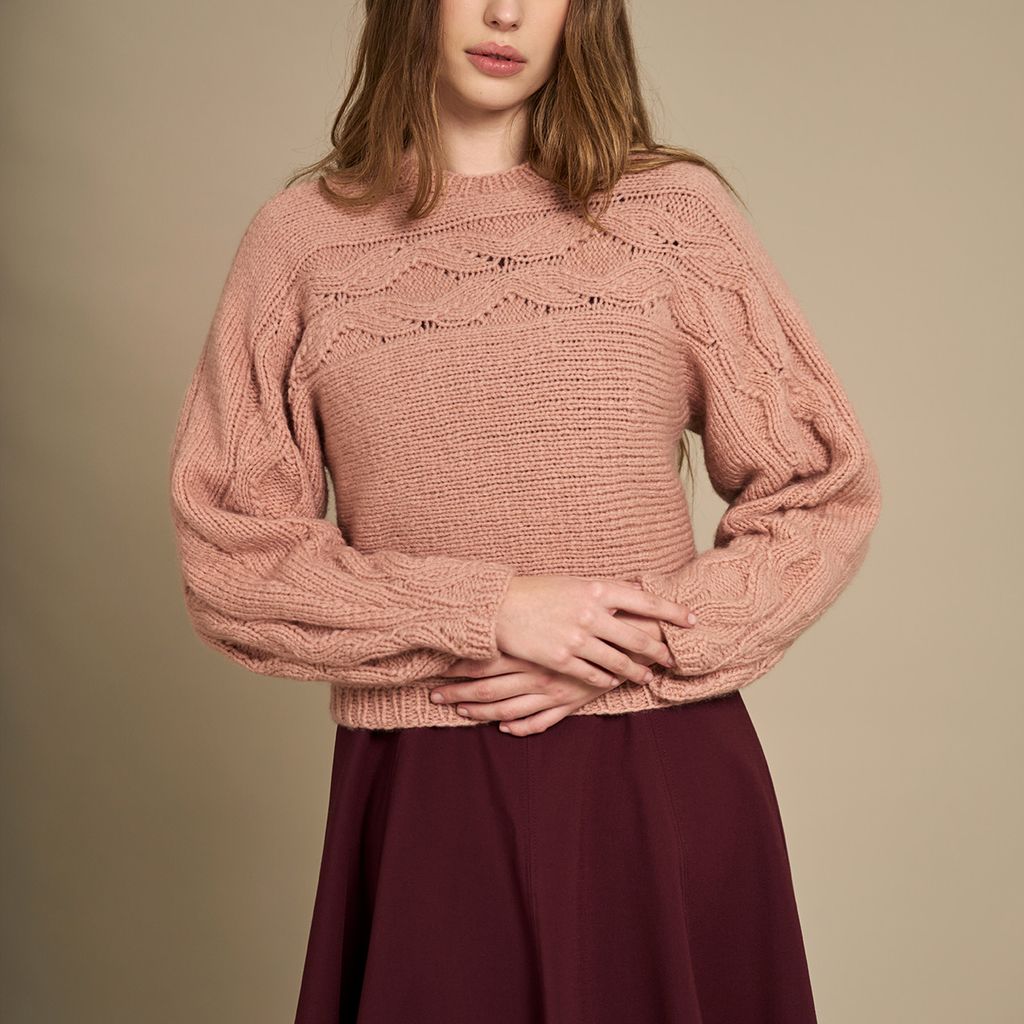
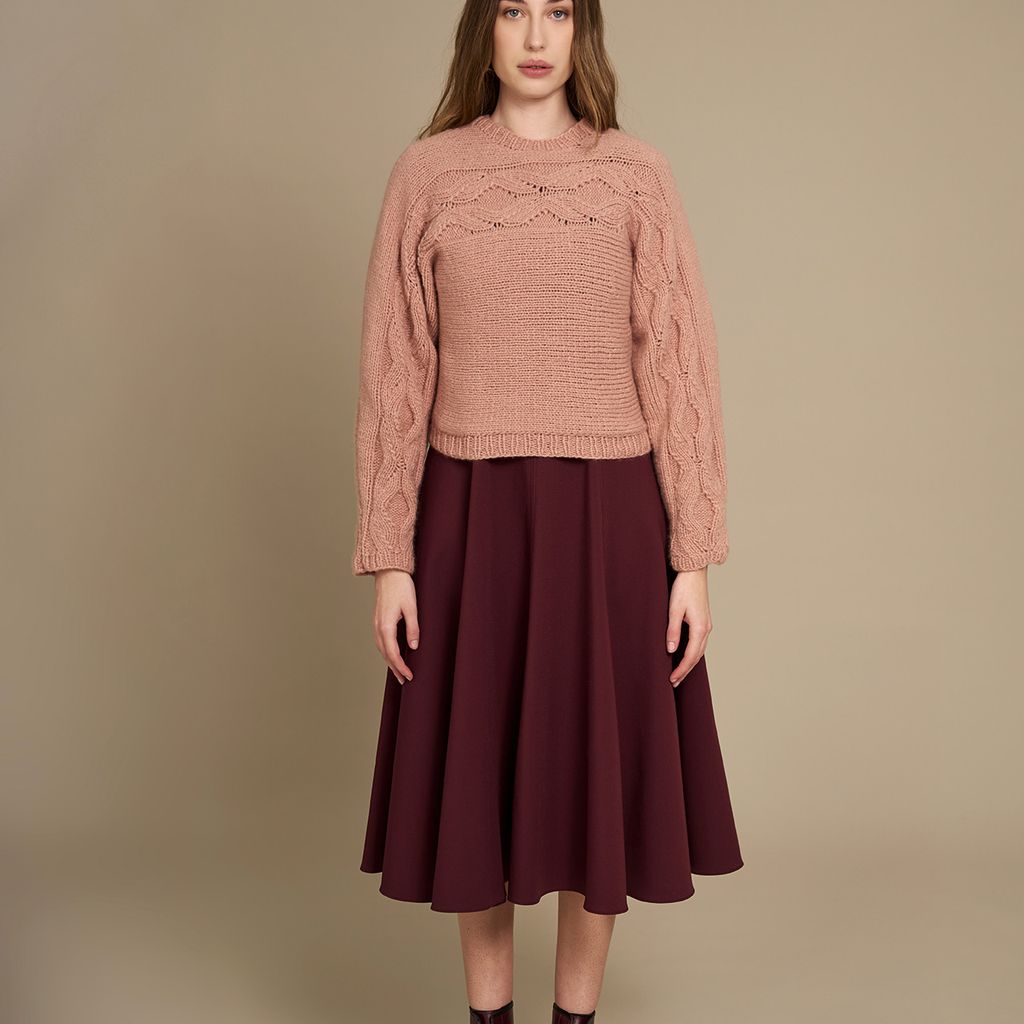
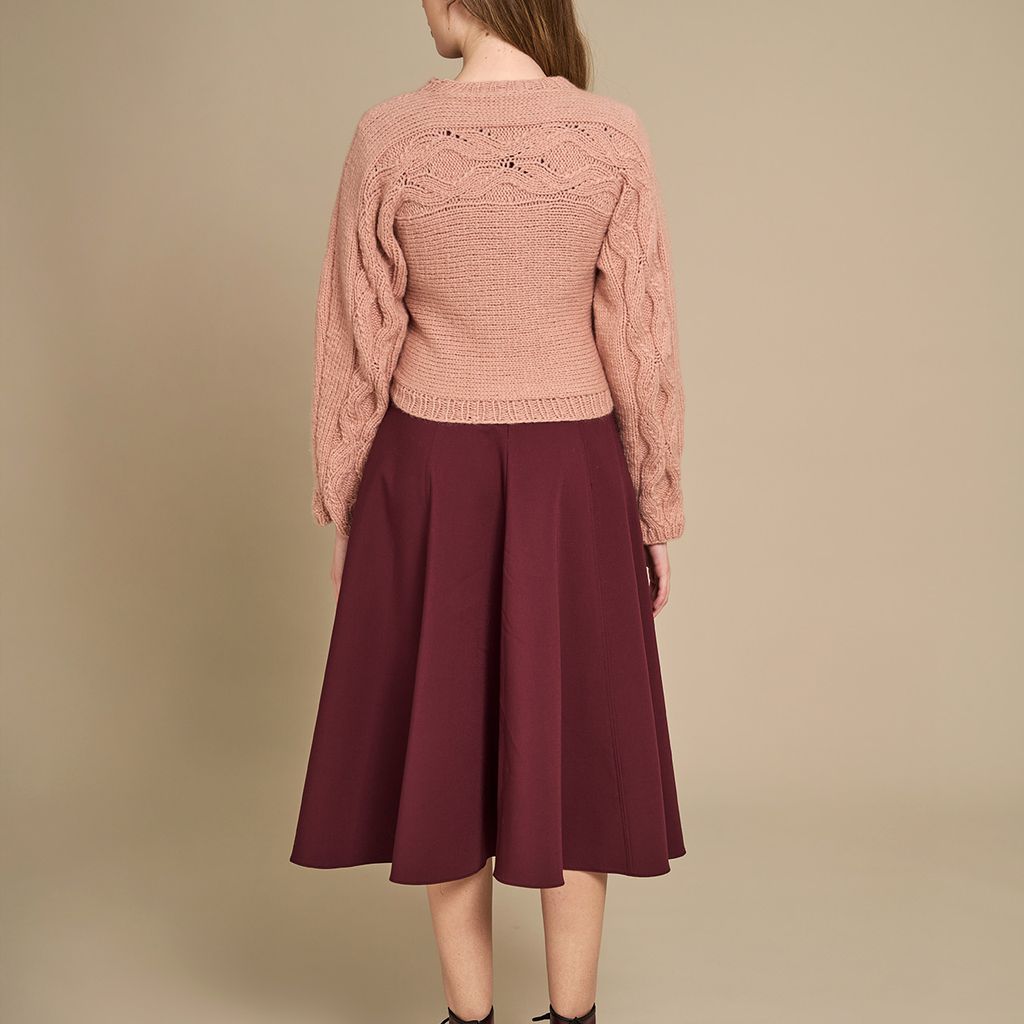
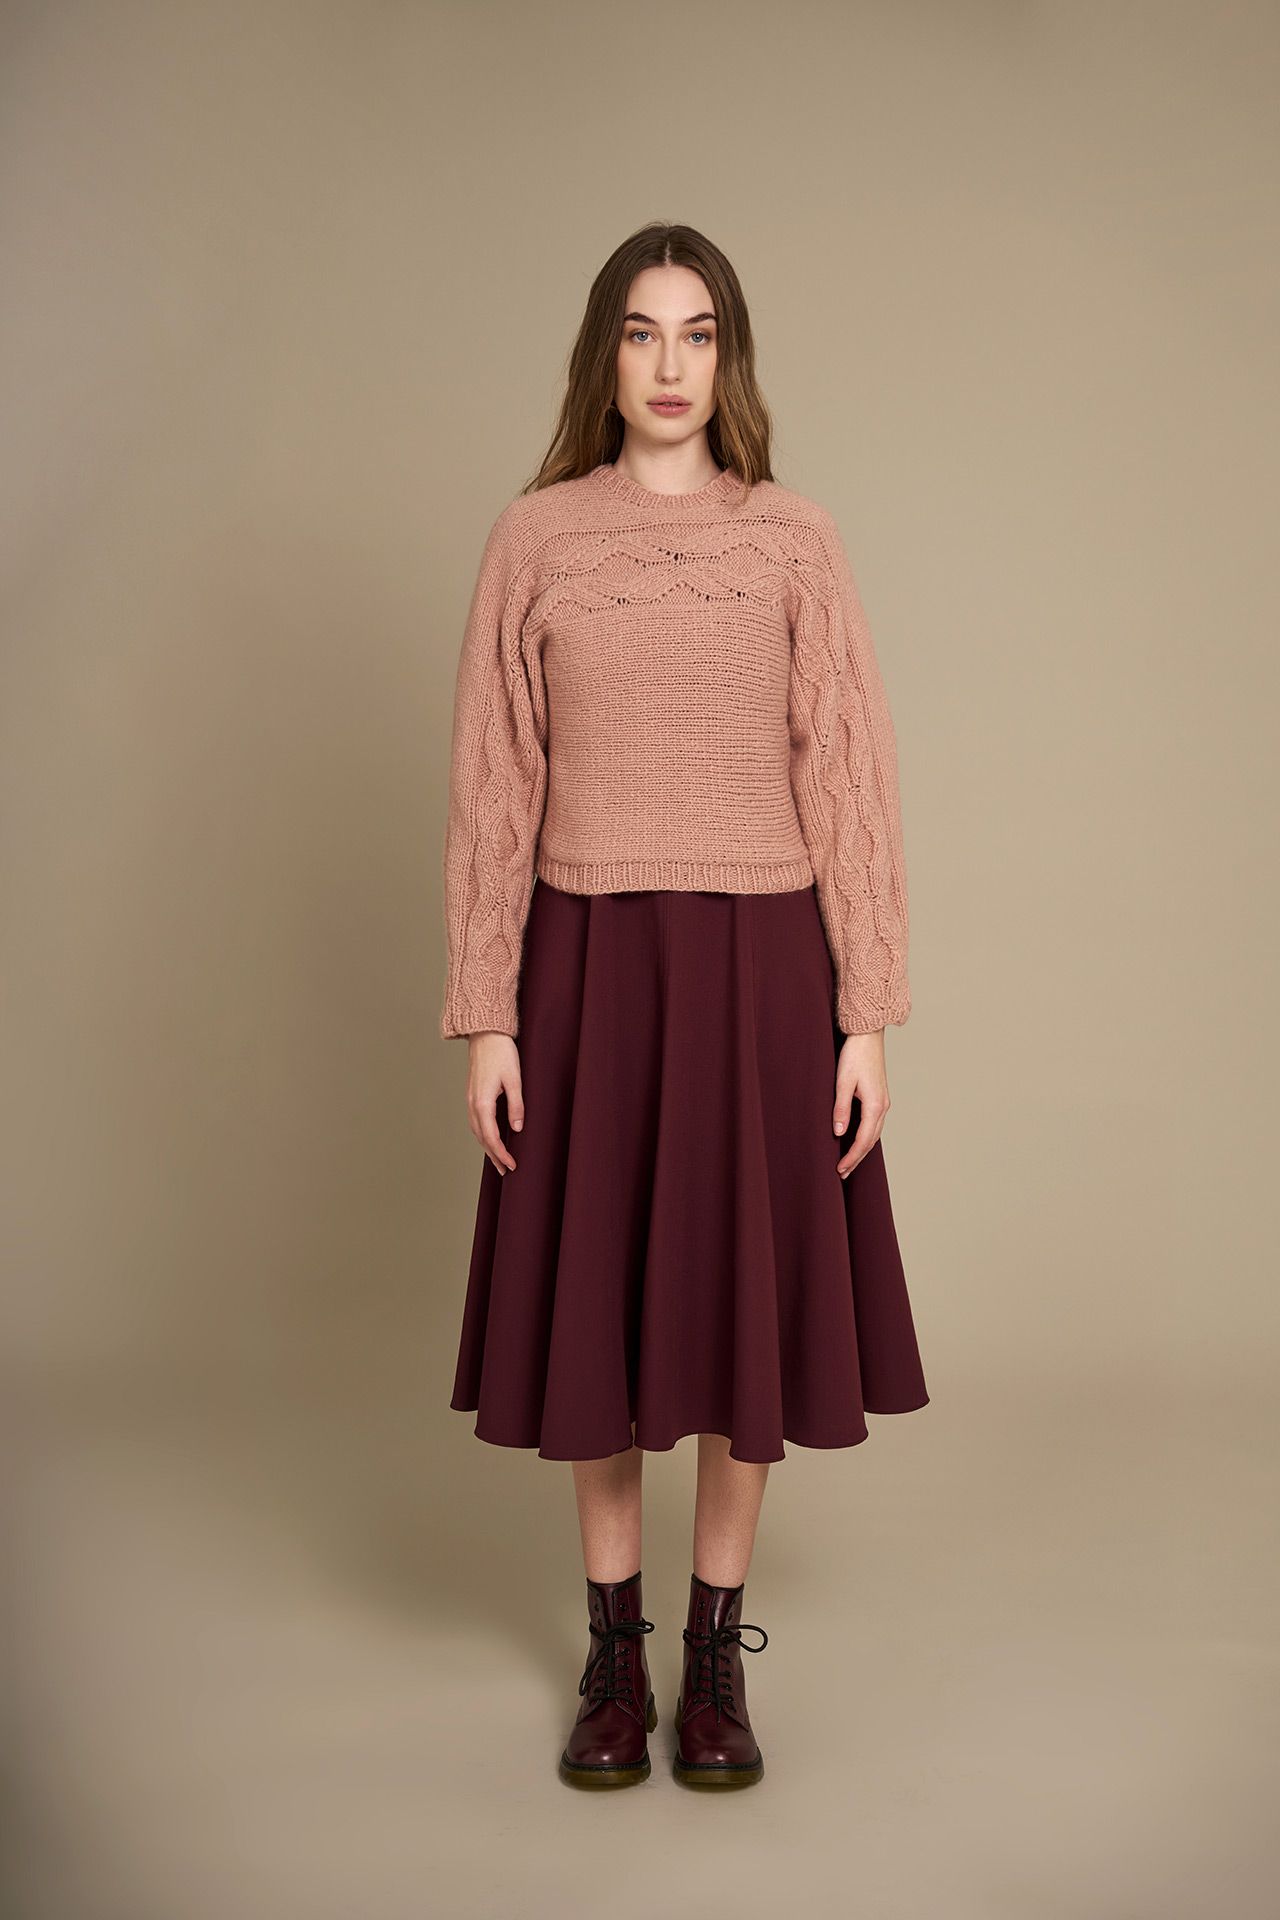
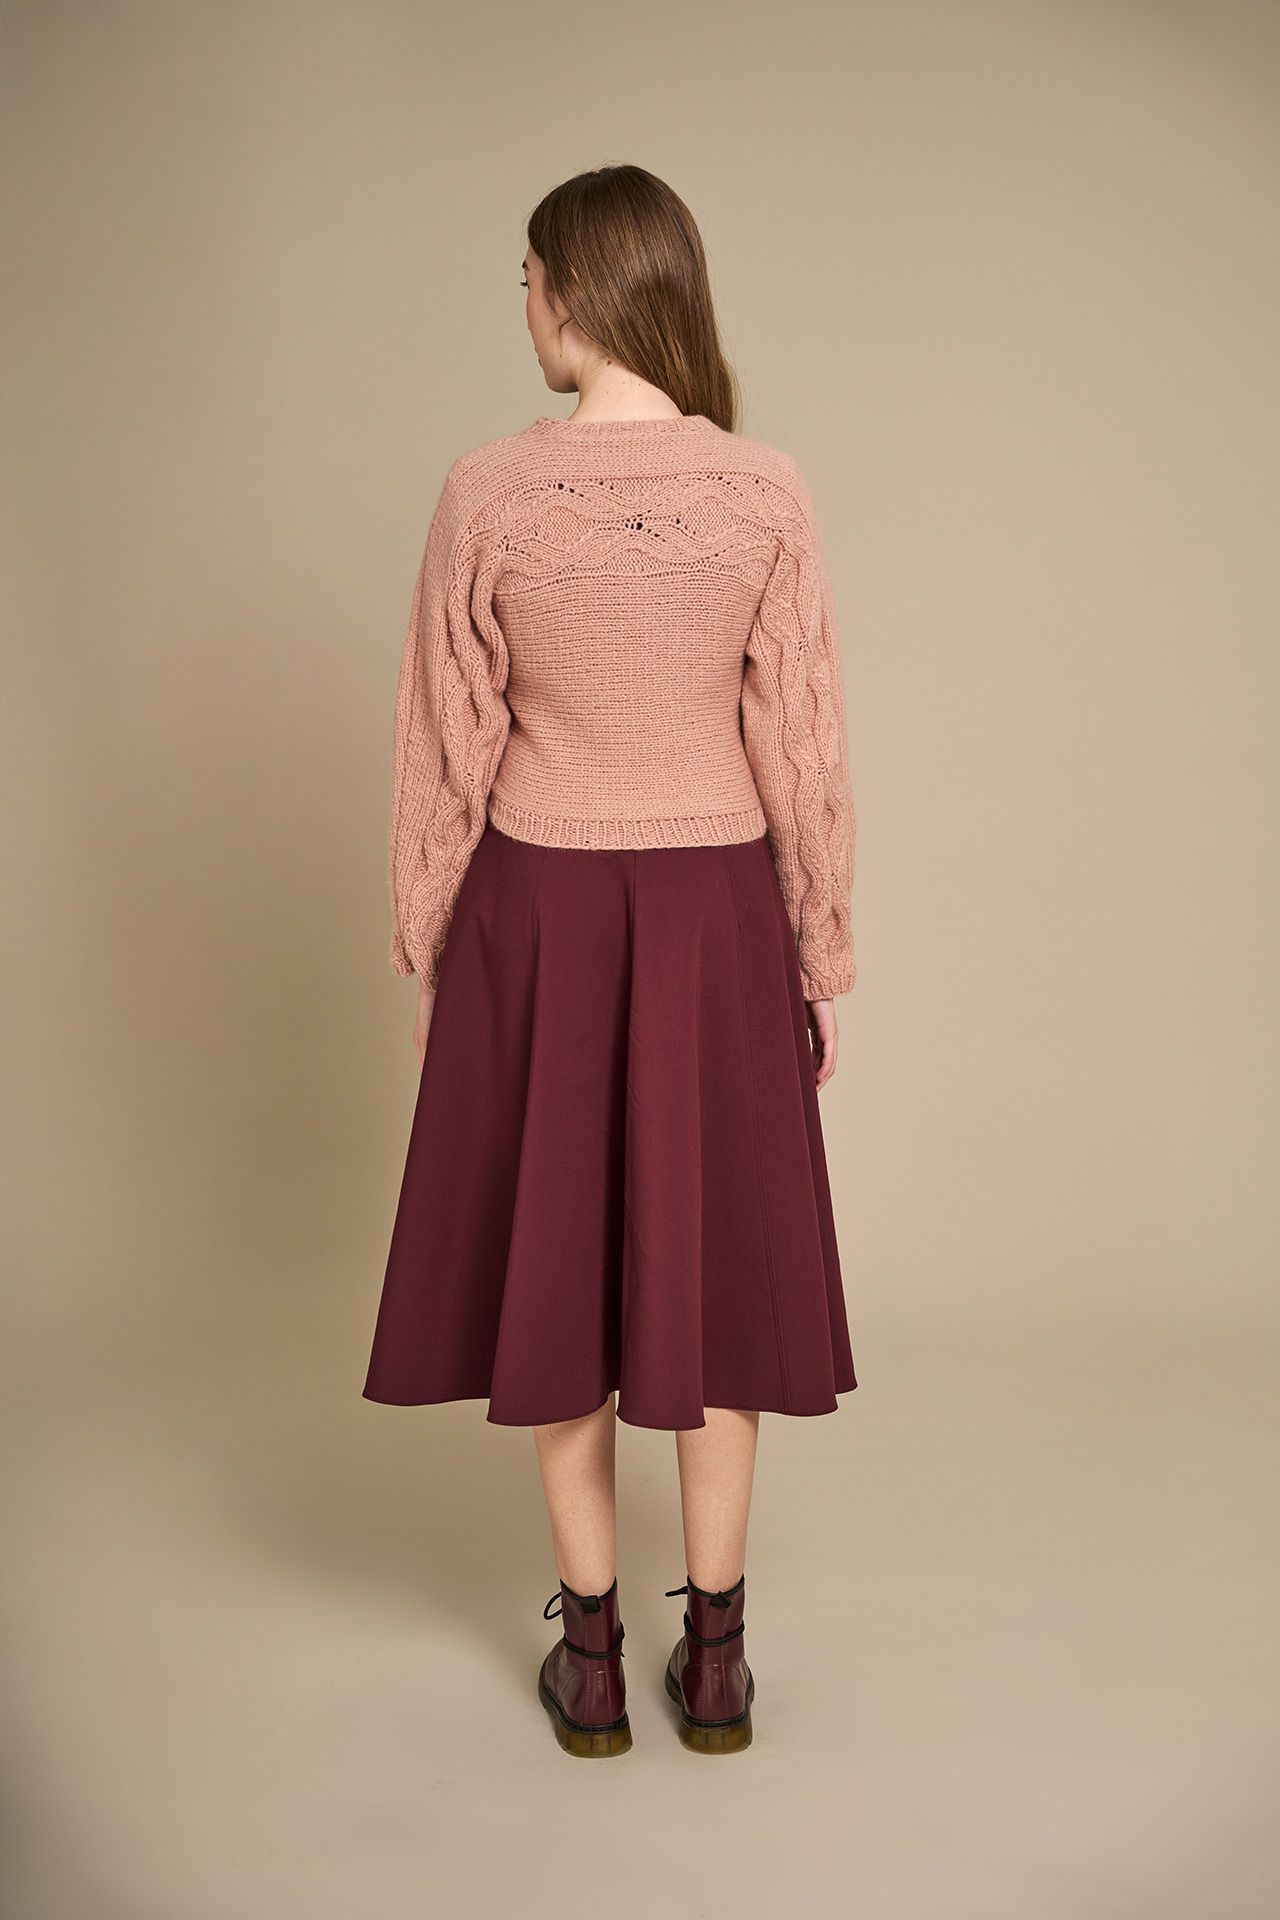
FINISHED MEASUREMENTS (as shown in the picture)
Bust circumference: 100 cm
Total length: 50 cm
Body length from underarm to hem: 28 cm
Upper sleeve circumference: 50 cm
Lower sleeve circumference: 26 cm
Sleeve length from underarm to hem: 35 cm
Procedure
FRONT
First sleeve
Start from the cuff of the sleeve.
Using size 7 mm needle tips, 80 cm cable and Rozena yarn, cast-on 21 sts.
** R 1 to 4: rib 1x1.
Continue following the diagram to work the 1st full pattern repeat as foll:
R 1 (RS): k2, work in cable pattern stitch according to diagram, k2
R 2 (WS): p2, work in cable pattern foll the diagram, p2.
R 3 to 8: rep r 1 and 2.
R 9: rep r 1.
R 10 (with increases): slip the 1st st as it appears, 1 incr and work the sts as they appear until 1 st remains, 1 incr and work the last st as it
appears. Cont in stockinette st on the 2 side sections and maintain the central 17 sts in cable pattern foll the diagram. At the same time, work
ncr as foll: incr 1 st after the first st and 1 st before the last st on r 16, 21 and 28 of the 1st diagram repeat, then on r 2, 10, 16, 25 and 31 of
the 2nd repeat, and on r 5 and 16 of the 3rd repeat. [the sleeve includes 3 full repeats of the cable pattern] **
Begin the 4th diagram repeat, continuing as established, but now increase only on the left side on r. 9, 11 and 15. These increases widen the
underarm area before working the body.
Body
On r 17 of the4th diagram repeat, cast on 27 new stsat the left edge for the first side seam. Continue working across all sts, including the newly
cast-on sts, as foll: work the sts before the cable pattern in stockinette stitch, work the 17-st cable pattern according to the diagram, then work
the sts after the pattern in stockinette stitch.
R 1 to 16 of the 5th diagram repeat: continue in established pattern: stockinette on the side sections and cable pattern foll the diagram over
the center 17 sts. At the end of r 16, begin binding off on the right side to shape the neckline as foll:
R 17: bind off the first st of the r and work the remaining sts of the r as established
R 18 and all even rows: work the sts as they appear, foll the diagram.
R 19: rep. r 17.
R 21: bind off first 2 sts, work the remaining sts as established.
R 23: bind off first 3 sts, work the remaining sts as established.
R 24 to 32: work in stockinette stitch on the 2 sections already in stockinette stitch and work the 17 sts in cable pattern foll the diagram.
The end of the 5th repeat marks the center of the neckline. Begin the 6th diagram repeat.
R 1 to 8: work in pattern as in r 24 to 32. At the end of r 8, cast on 3 new sts.
R 9: k3 over the newly cast-on sts, work the remaining sts as established.
R 10: work as established and cast on 2 sts at the end of the r.
R 11: k2 over the new sts, work the remaining sts as established.
R 12: work as established and cast on 1 st at the end.
R 13: k1 over the new sts and work the remaining sts as established.
R 14 and 15: rep. r 12 and 13.
After finishing the neckline shaping, complete the 6th diagram repeat by working r 16 to 32 over the same number of sts as established.
R 1 to 15 of the 7th diagram repeat, continue in established pattern: stockinette on the sides and cable pattern over 17 sts.
R 16: Bind off the first 27 sts (left side) for the second side seam, work remaining sts as established.
R 17: work remaining sts as established.
Begin underarm shaping on the same side as the second side seam.
R 18: bind off the 1st st and work the remaining sts as established.
R 19 to 21: work over the number of sts as established.
R 22: rep. r 18.
R 23: work over the remaining sts as established.
R 24: rep. r 18.
R 25 to 32: work as established.
*** Second sleeve
R 1 to 27 of the 8th diagram repeat: continue working in stockinette stitch on the 2 side sections and follow the diagram for the 17 center sts.
R 28: bind off 1 st at both ends of the r. Complete the 8th diagram repeat as established.
9th diagram repeat: continue as established: stockinette on the side sections and cable pattern over the center 17 sts. At the same time, bind
off 1 st at each end on r 5, 12, 17 and 22.
10th diagram repeat: work as established, maintaining the current st count.
To finish the sleeve, work 4 rows in 1x1 rib, then bind off all sts loosely.
Weave in all the remaining yarn ends. ***
BACK
Sleeve
Begin at the sleeve cuff.
With 7 mm needle tips, 80 cm cable, and Rozena yarn, cast on 21 sts and work as for the first front sleeve, repeating from ** to **.
Begin the 4th diagram repeat as established, but this time increase 1 st only on the right edge on r 9, 11 and 15. These increases will shape
the underarm area before working the body.
Body
At the end of r16 of the4th diagram repeat, cast on 27 new sts at the right edge of the panel for the first side seam. On r 17, begin working
across all sts including the newly cast-on sts, as foll: work in stockinette st up to the cable pattern, work the 17 center sts in cable pattern foll
the diagram, then continue in stockinette stitch to the end of the r.
R 1 to 18 of the 5th diagram repeat: work in established pattern: stockinette on the sides and cable pattern over the 17 center sts. At the
beginning of r 18, bind off 1 st at the left edge of the panel to begin shaping the neckline. Continue as foll:
R 19: work as established across the remaining sts.
R 20: bind off first st, work remaining sts as established.
R 21: work as established across the remaining sts.
R 22: bind off first 2 sts and work remaining sts as established.
R 23: work as established across the remaining sts.
R 24: bind off the first 2 sts and work the remaining sts as established.
R 25 to 32: continue in established pattern: stockinette on both sides and cable pattern over 17 sts.
The end of the 5th repeat marks the center of the neckline. Begin the 6th diagram repeat.
R 1 to 8: work as in r 25 to 32.
R 9: work as established, cast on 3 new sts at end of r.
R 10: work as established across all sts, including the new sts.
R 11: work as established, cast on 2 new sts at end of r.
R 12: work as established across all sts, including the new sts.
R 13: work as established, cast on 1 new st at end of r.
R 14: work as established across all sts, including the new st.
R 15 and 16: rep. r 13 and 14.
After completing the neckline shaping, finish the 6th diagram repeat by working r 17 to 32 with the current st count as established.
R 1 to 16 of the 7th diagram repeat: continue as established: stockinette on the sides and cable pattern over the center 17 sts.
R 17: bind off first 27 sts (right edge of the panel) for the second side seam. Work the remaining sts as established.
R 18: work as established across remaining sts.
Begin shaping the underarm on the same side as the bound-off edge:
R 19: bind off 1st st and work remaining sts as established.
R 20 to 22: work as established, maintaining the current st count.
R 23: rep. r 19.
R 24: work as established across remaining sts.
R 25: rep. r 19.
R 26 to 32: work as established.
Second sleeve
Work as given for the first one, repeating from *** to ***.
FINISHING
With right sides facing, align the front and back panels. Using a darning needle, sew the edges of the two panels together along the shoulders,
sleeves, sides, and underarms.
Bottom hem: with 7 mm needle tips and 80 cm cable, pick up sts along the bottom edge of the body (both front and back). Work 9 r. in 1x1 rib,
then bind off all sts loosely.
Neckband: with 6 mm needle tips and 40 cm cable, pick up sts evenly around the neckline. Place a BOR marker and join to work in the round.
Work 7 r. in 1x1 rib, slipping the marker at the end of each round. Then bind off all sts and weave in all ends.